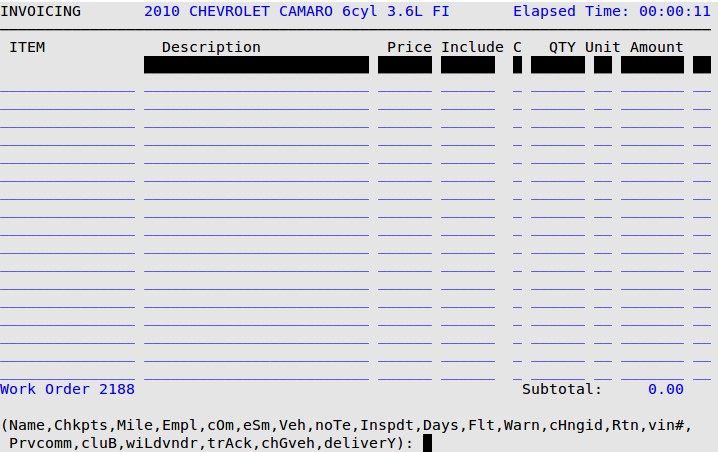
As a vehicle is being serviced, the 2PopUp Menu may be used to add, remove, or change the fleet to which the vehicle is attached. This menu can be accessed instantly at any time during the service.
To create a new fleet or edit a fleet’s settings, go to Set Up Charge Customers (1-4-2).
Use the following steps to access the Fleet PopUp:
| Note: | The popup can also be reached from the tendering screen in the same way. |

| Note: | If a fleet with notes is already attached to the vehicle, you receive the Fleet Notes popup, shown below. Press 0 to go to the Fleet Requirements screen.
|

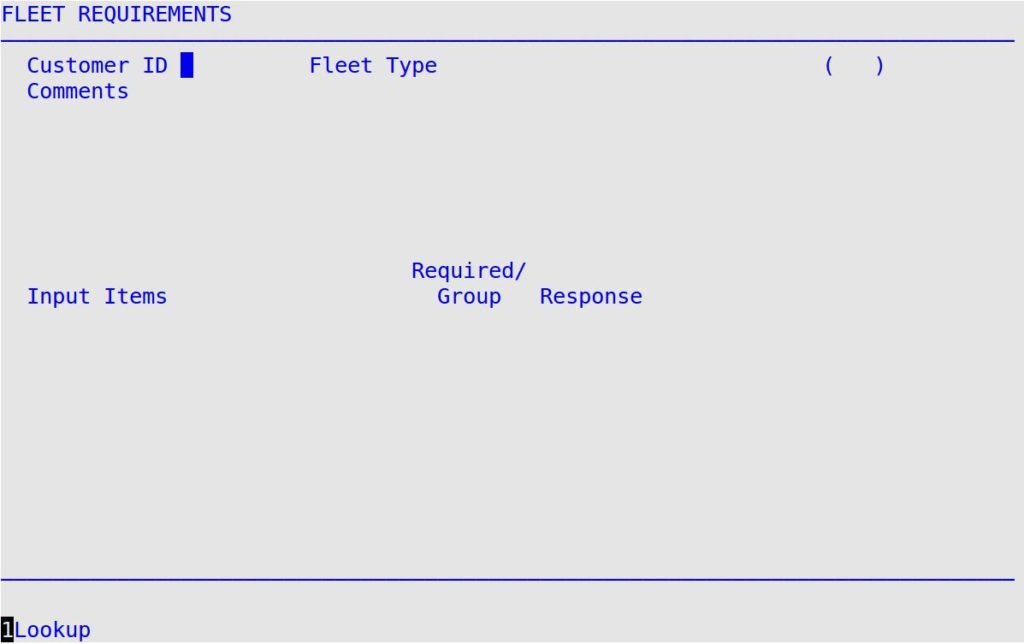
Customer ID
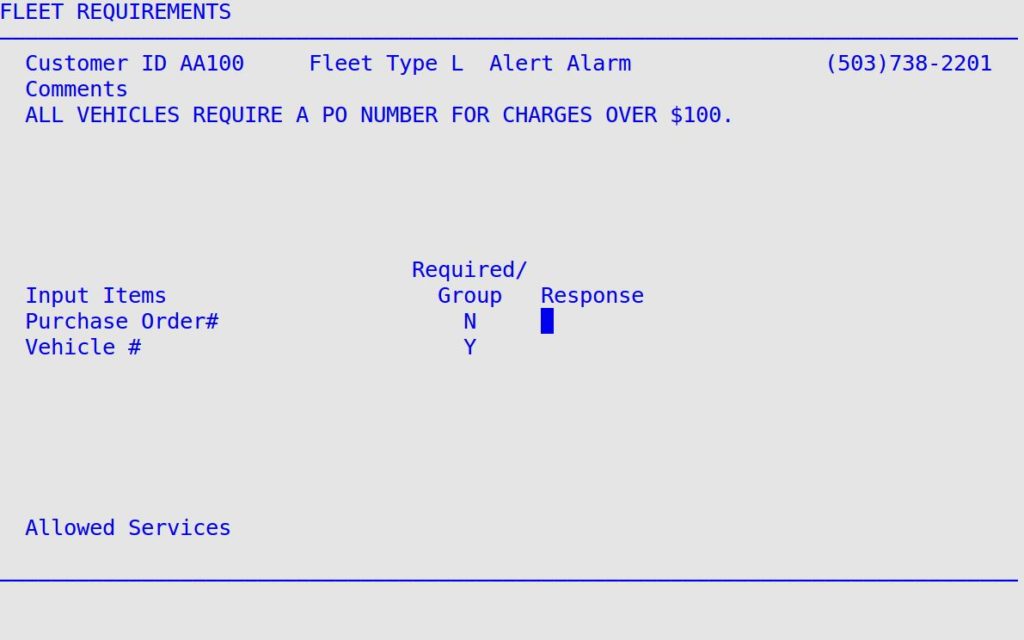
Type the 1- to 9-character charge customer identification code. If the vehicle is already attached to a fleet, the cursor starts in the Response field. Press the Up Arrow to access the Customer ID field, if you want to change or delete the existing fleet.
| Note: | If you do not know the customer ID for an existing charge customer, press [F1] from the Customer ID field to receive the Fleet Lookup. Enter the name of the fleet customer and then arrow down to select the record you want. Press [Enter] to fill in the Customer ID and Type fields automatically.
|
Fleet Type
Fill in whether the charge customer is a local or national fleet. Type L for local fleets or N for national fleets. The customer name and phone number are filled in automatically.
Comments
Make sure you read the comments on this screen. (Display only)
Input Items
If there are any Input Items set up for this fleet, the descriptions are filled in automatically. (Display only)
Required/Group
If a response is required for an input item, the field displays Y. If a response is not required, the field displays N. If the field displays a number from 1 to 9, the input item is part of a group and at least one response is required.
Response
If you do not want to fill in all of the charge customer information now, you do not have to at this point. If the customer is a billed customer, the system forces you to fill in the required information completely at the Cashier Station before you can cash out the customer.
| Note: | Press [F1] from the Response fields to bring up the Help popup, which displays formatting instructions for the response. |
Allowed/Denied Services
If there are any allowed or denied service codes set up for the fleet, the first 30 are displayed here. (Display only)
