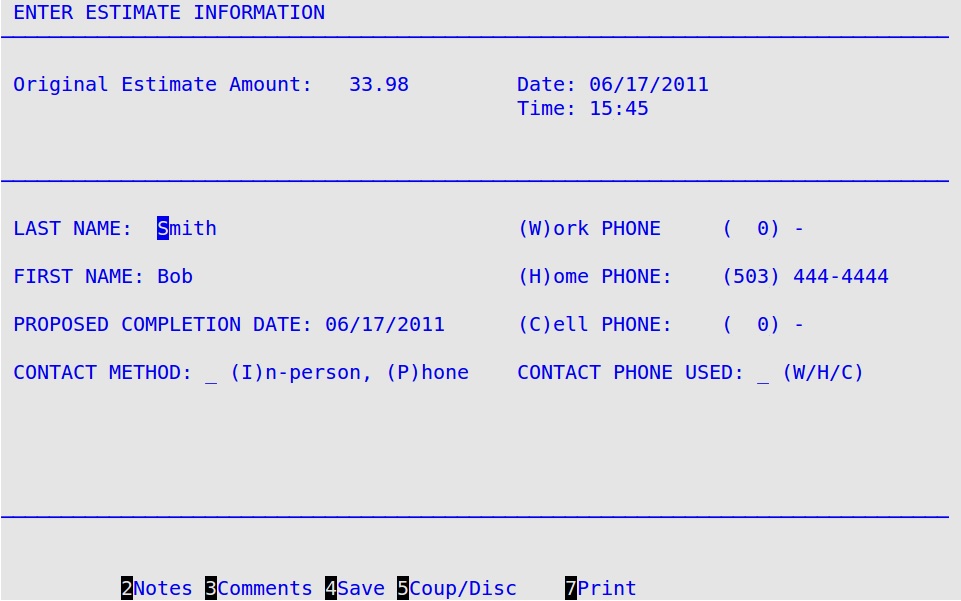
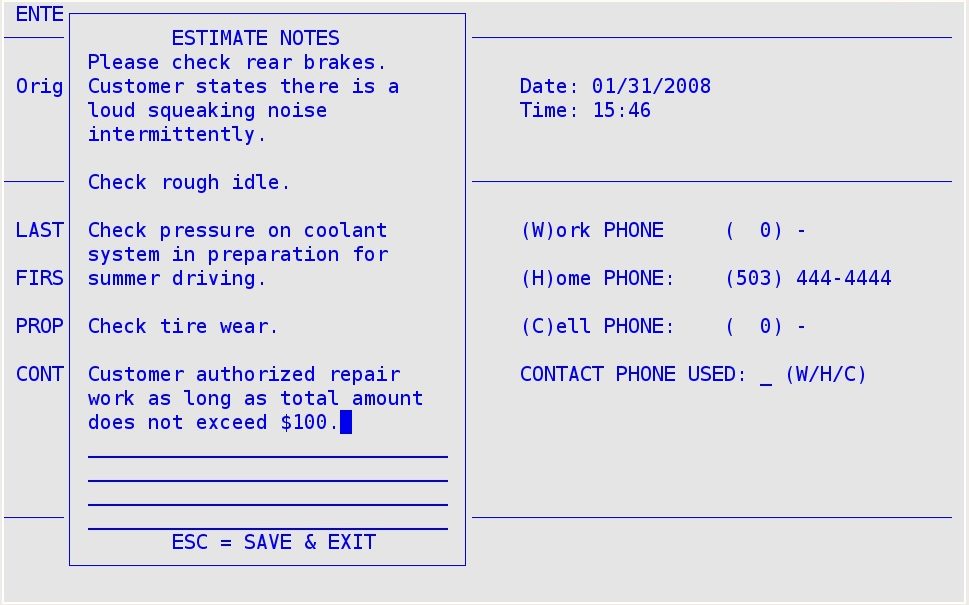
The Enter Estimate Information PopUp allows you to create a printed form that lists potential services to be performed on a customer’s vehicle and the cost of these services. You can specify on the Set Up Estimating screen (1-6-7-1) whether you want to activate the Estimating functionality for use during the invoicing process.
| Note: | For instructions on activating and setting up the estimating functionality, see Setting Up Your System to Use the Estimating Functionality. |
Use the following steps to create an Estimate:

Original Estimate Amount
Shows the gross amount of the Estimate. (Reference only)
Additional Amount
If this is a new Estimate, this field will not appear. If this is a revised Estimate and the total is greater than the original Estimate amount, the additional amount will appear. (Reference only)
Revised Total
If this is a new estimate, this field will not appear. If this is a revised Estimate and the Estimate total is different than the original Estimate amount, the revised total will appear. (Reference only)
Date
Shows today’s date as it appears in the Center Control File. (Reference only)
Time
Shows the time the Estimate was created. (Reference only)
Last Name, First Name
The system automatically fills in the first and last name of the customer who will authorize work to be done. Press [Enter] to accept the customer name or type in a new first and last name of the customer who brought in the vehicle. If you want to change this name, type it in here. (Required)
| Note: | The name entered here will print on the Estimate and the Invoice. This may be different from the customer name on the Maintain Vehicle History screen (1-4-1). |
Proposed Completion Date
The system fills in the current date (MM/DD/YYYY) that you expect work to be completed on the vehicle. If you want to change the date, type the new date (MM/DD/YYYY) in this field.
(W)ork Phone
Type the work area code and phone number. If this number has been previously entered, the system will automatically fill it in.
(H)ome Phone
Type the home area code and phone number. If this number has been previously entered, the system will automatically fill it in.
(C)ell Phone
Type the cellular area code and phone number. If this number has been previously entered, the system will automatically fill it in.
Contact Method (I)n-person, (P)hone
Type I to indicate the Estimate was approved by the customer in person. Type P to indicate the Estimate was approved by the customer over the phone. (Required)
Contact Phone Used
If the contact method is Phone, you must specify which phone number was used. Type W if you contacted the customer’s work phone number for Estimate approval, H if you contacted the customer’s home phone number, or C if you contacted the customer’s cellular phone number. (Required)
Reason for Revision
If you have printed an Estimate, this field will appear. Type the reason (up to 50 characters) for adding items to the original estimate. (Required for revised estimates)


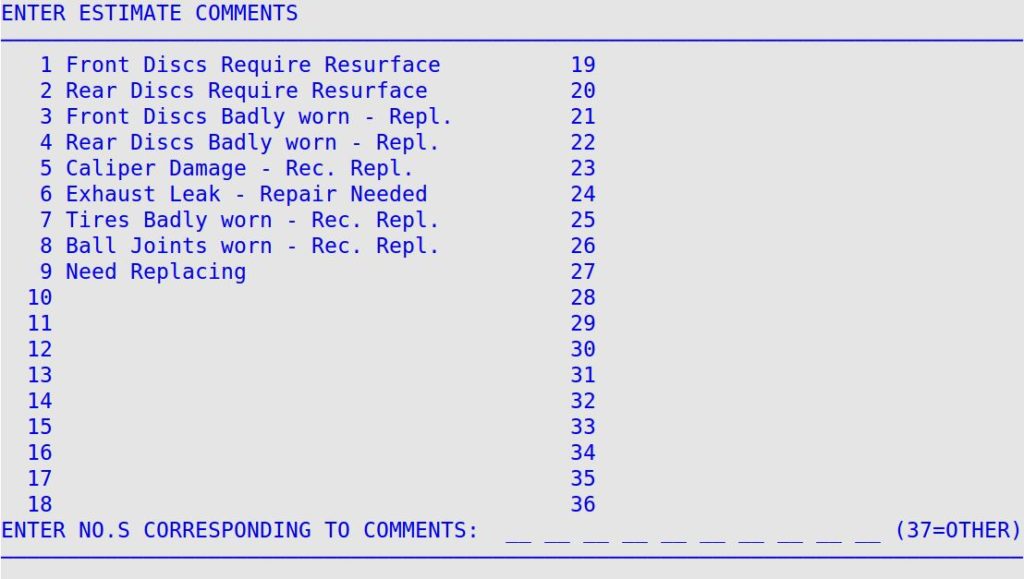
| Note: | You can also use the on-the-fly comment feature. This allows you to include a comment on an Estimate that is specific to one customer for one visit. These comments print on the Estimate just like a regular comment, and are archived with the estimate information. |
Use the following steps to set up an on-the-fly Estimate comment.
