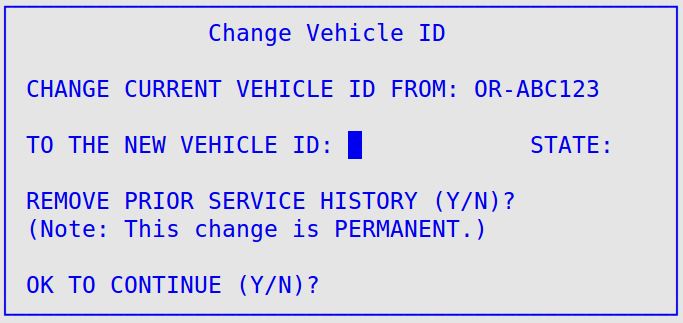
The Change ID PopUp allows you to change the ID of a vehicle. You will mostly use this function to correct vehicle ID information that was entered incorrectly.
Use the following steps to change the vehicle ID:
- On the Enter Invoices-Invoicing screen, press [F2] to display the PopUp Menu at the bottom of the screen (see below).

- Press H. The system will automatically bring up the following, which prompts you for the ID you want to change to.

- Type the new vehicle ID and state or province (if state/prov in ID is enabled) and press [Enter]. The new vehicle ID cannot be blank or the same as an existing vehicle, and it cannot be for a vehicle with an invoice in progress. You will see a specific error if you fall into one of these prohibited scenarios.
- At the Remove Prior Service History prompt, you can specify whether you want to delete all prior history. This only applies to vehicles that contain service history.
| Note: |
If you choose to delete all prior history, you also delete the old vehicle ID and VIN number. |
- At the OK to continue prompt, type Y and press [Enter] to change the vehicle ID and return to processing the customer invoice.
![]()
