
Refund functionality is now available in LubeSoft.
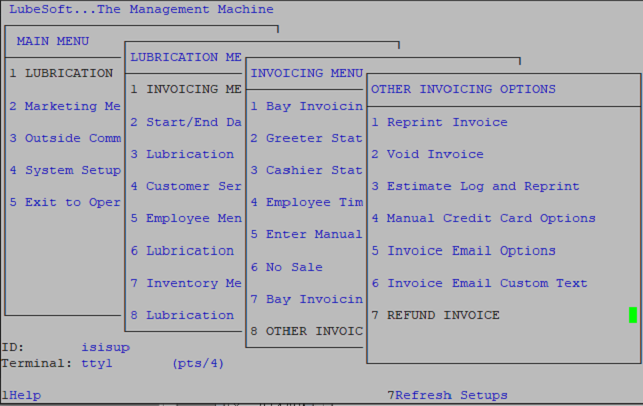
“Refund Invoice” is found by navigating to Lubrication Menu (1), Invoicing Menu (1), Other Invoicing Options (8), Refund Invoice (7) from the main menu.
Enter in to the Refund Invoice menu to receive the following screen:
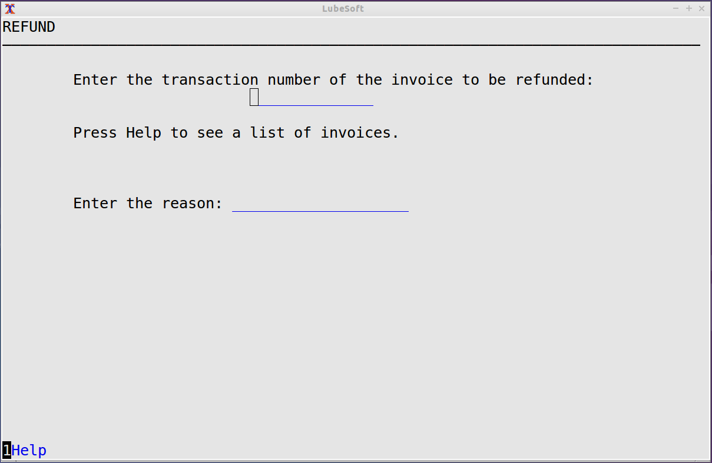
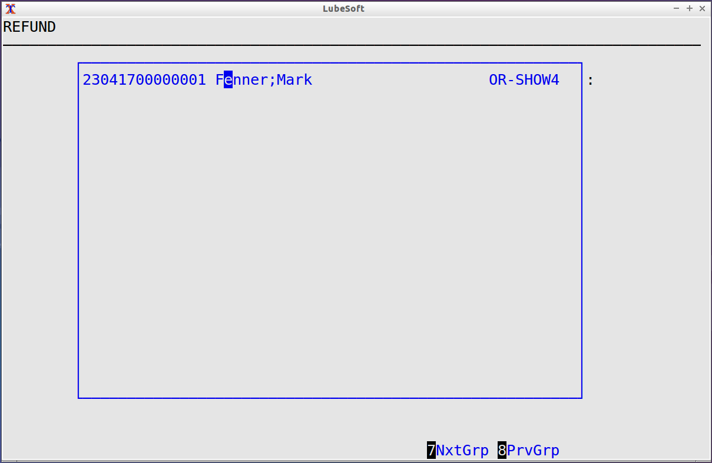
The screen above is used to select an invoice to create a refund transaction from. It functions very much like the ‘Void Invoice’ screen. You may press F1 to select an invoice from a pageable list that displays trannumber, customer, and vehicle ID. If you know the trannumber of the invoice you want to refund, you can also just type that into the first input field. You will then be prompted for a password and reason for the refund transaction. If you choose to press F1, you will be presented with the following screen.
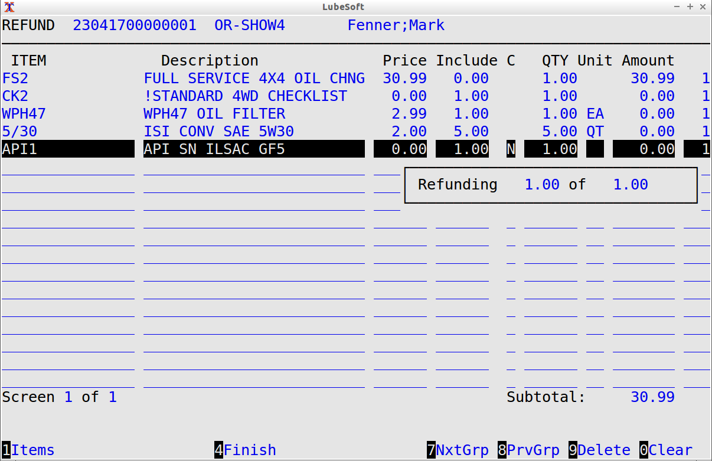
This screen is where we select the items from the original transaction that will be included in the refund transaction. The screen will display line items similarly to how they are shown during the invoicing process. Pressing “Enter” on an item in the list will allow you to change the quantity to be refunded, as well as the quantity to return to stock (for P, L, or S items) as shown below.
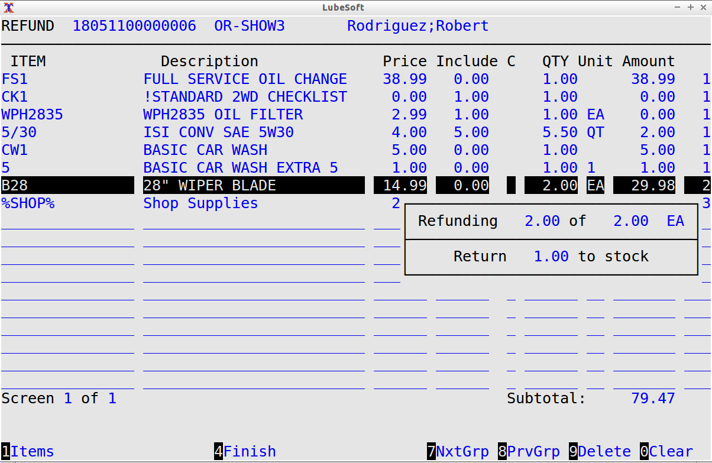
The F1 Help screen displays an item list that represents the items that were on the original invoice. The item ID, line#, and group# are shown to help identify which specific item you are selecting. The “Remaining QTY” is the quantity of that item that has yet to be refunded. If that value is less than the originally invoiced quantity for an item that has not been added to the current refund transaction, it is because a previous refund has taken place that included that item. **Note that once an item is added to a refund, its “Remaining QTY” value will adjust accordingly. Items with no remaining quantity cannot be added to a refund transaction. If a user attempts to add an item that is already present in the item list, they will be prompted to edit the quantity of that item instead.

When you are finished building the refund transaction, you will “Finish” the refund process by pressing F4 and you will be taken to the Tendering Screen.
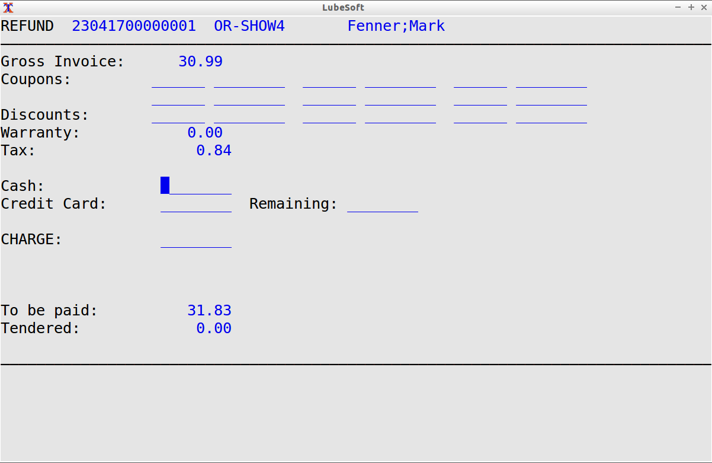
Tendering Screen: The tendering screen looks and functions similarly to the cashier tendering screen. “Gross Invoice” is shown at the top of the screen. Coupons and discounts that were present on the original transaction, and have not yet been refunded, can be added via pressing F1 while in a coupon or discount field. Currency can be returned to the customer via Cash, Credit Card, and/or Charge. For Credit Card and Charge, the sum of all credit or charge values refunded will not be allowed to exceed the originally invoiced amount for that respective payment method. All other payment methods are refundable as cash.
The “To be paid” amount is the total amount that will be returned to the customer, accounting for promotions, warranties, and taxes. This screen will not allow the user to tender more than the amount “To be paid”, nor will it allow a specific payment method to exceed its originally invoiced amount. Once the tendered amount is equal to the amount to be paid, the user will be prompted to proceed with finalizing the refund, and choosing an invoice delivery method, similar to the cashier process.
