The Greeter Station is designed to allow you to enter basic customer and service information. This function allows your technicians to meet customers before the actual service and gather vehicle and customer information to streamline the service. This information is sent to the bay stations and is accessed at a bay when the vehicle is being serviced. You can also process invoices at the Greeter Station just like you can at the Bay Invoicing Station. LubeSoft has two ways to process invoices, giving you a choice of the type of center you want to run.
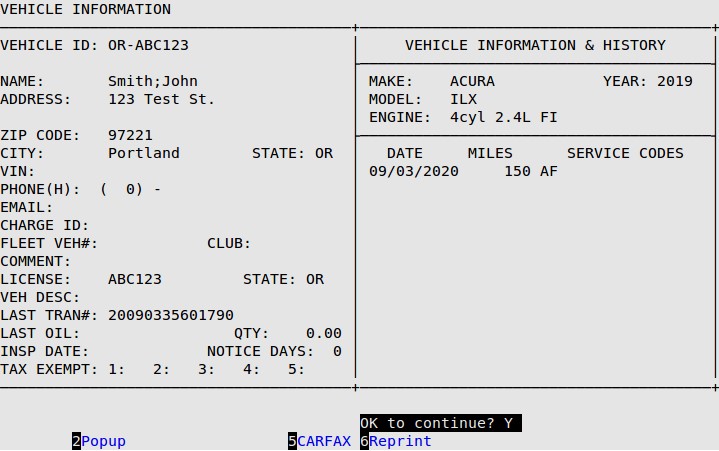
After you have been using the system for a while, many of your customers will be repeat customers. When you enter the vehicle ID, if the system finds a matching vehicle ID, it assumes that the vehicle is a repeat customer and lists the information it has about the vehicle and the customer.
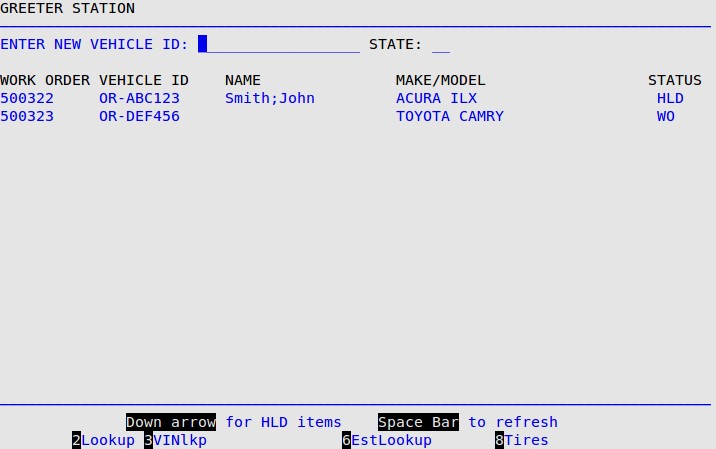
Use the following steps to process a repeat vehicle through the Greeter Station:
| Function Key | Description |
|---|---|
| 2Lookup | Allows you to search for a vehicle using the customer’s name. |
| 3VINlkp | Allows you to search for a vehicle using up to the last 8 characters of the VIN. |
| 6EstLookup | Allows you to search for estimates previously created at the store. This option is only displayed if the Estimate feature is active. |
| 8Tires | Allows you to search through tire inventory. This option is only displayed if Tire Help has been enabled in the Center Control File (1-6-1-1). It opens the Tire Search PopUp. |
| Note: | If your store uses alternate IDs and the License Number has not been filled in, you receive a prompt. Fill in the License Number field (and State field if required) and press [Enter]. |
If you are unsure of the vehicle ID or if you use another customer identification method, there are several ways to quickly find a returning customer record:
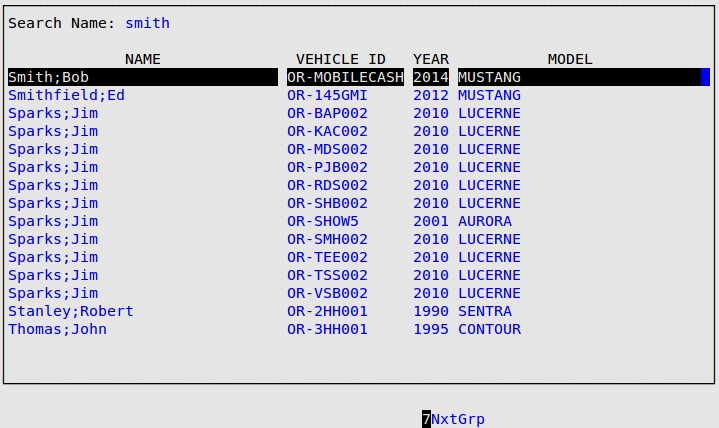
| Note: | You need to type the last eight characters of the VIN instead of the first eight characters because the last eight characters of each VIN are unique to each vehicle. |
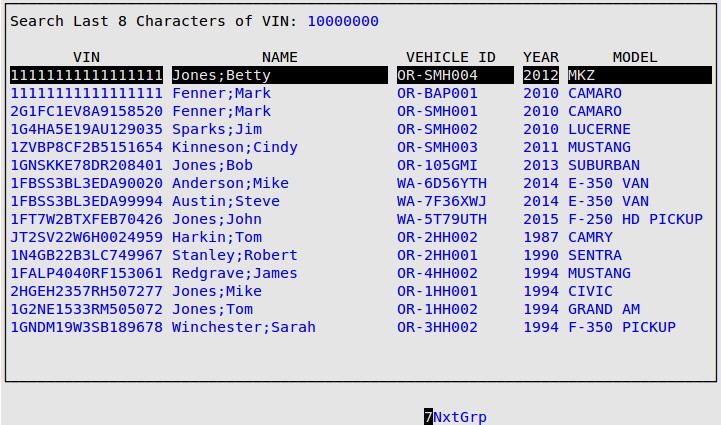
| Note: | For step-by-step instructions on how to create an Estimate, see the Using Estimating article. |
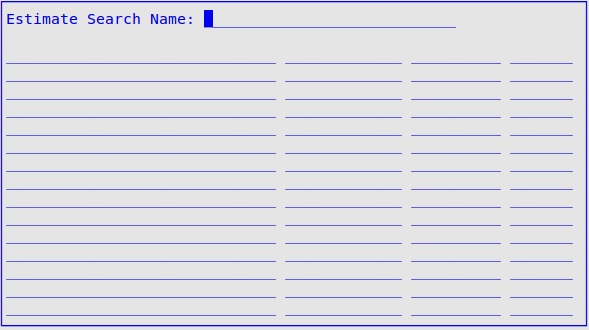
| Function Key | Description |
|---|---|
| 2Popup | Allows you to update the customer name or VIN. |
| 5Carfax | This key is only visible if the Carfax service history check is enabled. It displays the date, mileage, and services performed for the vehicle, as reported by Carfax. |
| 6Reprint | This displays a list of previous invoices for this vehicle. Plain paper invoices cashed out at this store may be viewed or reprinted. |
| Note: | If the Club Auto PopUp field is set to A or B on screen 1 of the Center Control File, the Club Auto PopUp will appear. |
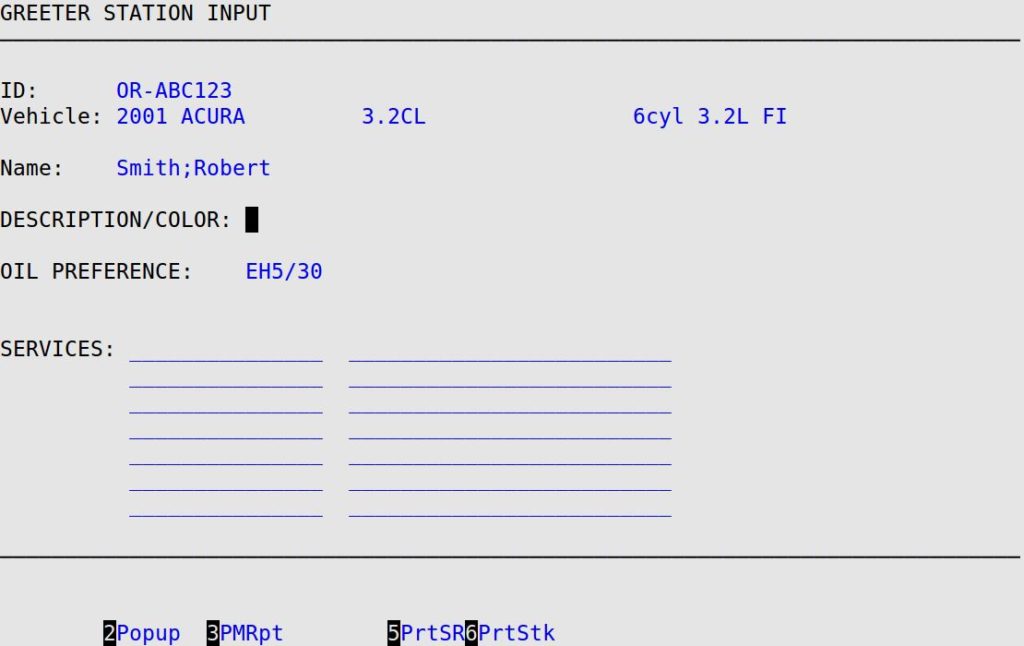
The following list explains the function keys at the bottom of the screen.
| Function Key | Description |
|---|---|
| 2Popup | Brings up the PopUp Menu on the bottom of the screen which allows you to access the Name, Mileage, Comments, Note, VIN, Inspection Date, Days Between Services, Fleet, Club, and Warning PopUps. See the Using the PopUp Menus article for more information. |
| 3PMRpt | This function key only appears if you use ISI’s Preventative Maintenance add-on product. This option allows you to print the Preventative Maintenance Report from this screen. |
| 5PrtSR | Prints a Service Review Report for the current vehicle ID. This report includes services performed on the vehicle and the mileage when each service was performed. You must enter the current mileage, through the Mileage PopUp, before you can print a Service Review. |
| 6PrtStk | Prints a Thermal AutoSticker for the current vehicle ID. You must enter the current mileage, through the Mileage PopUp, before you can print a sticker. |
ID
The system displays the vehicle ID of the vehicle you are greeting. (Display only)
Vehicle
The system displays the year, make, model, and engine size of the vehicle. (Display only)
Name
The system displays the customer’s last and first name. (Display only)
| Note: | At any time while filling in this screen, you can press [F2] to bring up the PopUp Menu. From this menu, you can select the name, mileage, comments, note, inspection date, days, fleet, warning, return date and mileage, VIN, and club popups. These options are explained in the Using the PopUp Menus article. To decrease bay time, enter Name information for new customers at the Greeter Station. |
Description/Color
Fill in a brief vehicle description (up to 25 characters). Entering the vehicle color is suggested. The value entered in this field is displayed in the Veh Desc field on the Maintain Vehicle History screen.
Oil Preference
Specify the type of oil requested by the customer.
Services
Enter up to seven services requested by the customer. A brief description is automatically filled in by the system. The Job Items and AddOns are not shown, but they will show up at the Bay Invoicing Station. Press [F1] to bring up a list of all the valid inventory item numbers you can put in the Services fields. By default, the list starts at the Full Service category (FS). Select an item from the list and press [Enter] to fill it in automatically on the screen. Press [F7] and [F8] to scroll through the groups of items until you locate the item you want. Use the Up and Down Arrows to select the item, then press [Enter] to fill in the item’s part number and description into the Services field. To get out of the Help PopUp without selecting an item, press [Esc] [Esc].
| Note: | The Help PopUp contains only those items that have been set up to Include in Help Y in Set Up Inventory Items (1-7-1-2). |
For additional instruction on invoicing vehicles, see the following articles: