The Invoice Email Settings screen allows you to customize settings for emailing customer invoices, capturing signatures, and reviewing mobile work orders.
Invoice emails will be sent as a PDF attached to an email. A new popup will appear during tendering that prompts your cashier to select whether the customer wants their invoice printed, emailed, or both printed and emailed. The Invoice Delivery Method PopUp can also be accessed using the F2 PopUp on the Enter Invoices – Invoicing screen, except when processing a quick sale.
Use the following steps to set up invoice email options:
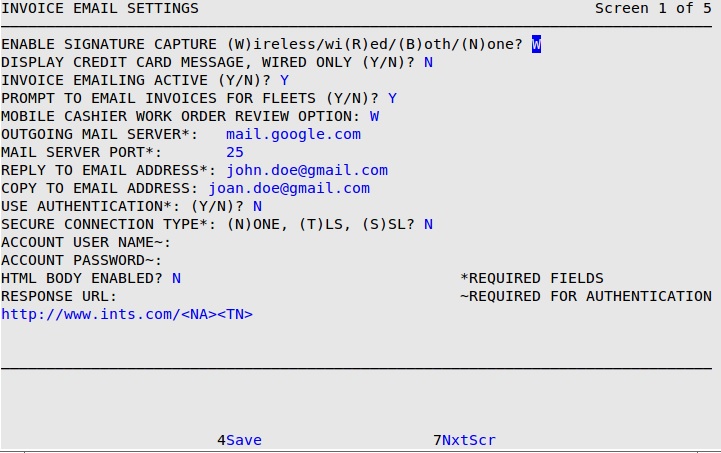
Enable Signature Capture
Codes:
Display Credit Card Message, Wired Only
Enter Y to display a credit card message on the Topaz® device.
Invoice Emailing Active
Enter Y to enable the ability to email invoices to customers.
Prompt to Email Invoices for Fleets
Enter Y to automatically display the Invoice Delivery Method PopUp during tendering for charge customers. Answering N will allow fleet invoices to be emailed, but the Invoice Delivery Method PopUp will not be automatically displayed.
Mobile Cashier Work Order Review Option
Codes:
Outgoing Mail Server
Enter the outgoing mail server in this field. This field is required if Invoice Emailing is active.
Mail Server Port
Enter the mail server port. This field is required if Invoice Emailing is active.
Reply To Email Address
Enter the email address where you want email replies from customer directed. This field is required if Invoice Emailing is active.
Copy to Email Address
Enter the email address where you want copies of the invoices sent.
Use Authentication
Enter Y if your email service provider requires authentication. This field is required if Invoice Emailing is active.
Secure Connection Type
Select the type of authentication your email account requires. This field is required if Invoice Emailing is active. Codes:
Account User Name
Enter your email account user name. If Use Authentication is set to Y, this field is required.
Account Password
Enter your email account password. If Use Authentication is set to Y, this field is required.
HTML Body Enabled
Enter Y to enable HTML in the body of the message.
Response URL
Enter in a website address that can be utilized in your invoice email body text to direct your customers to a desired website. Press [F1] for a list of codes that can be used to build the URL.
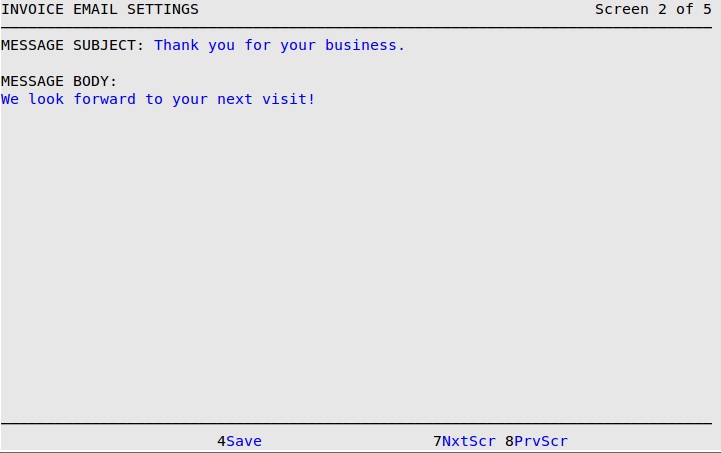
Message Subject
Enter the text of the subject line for invoice emails sent to customers.
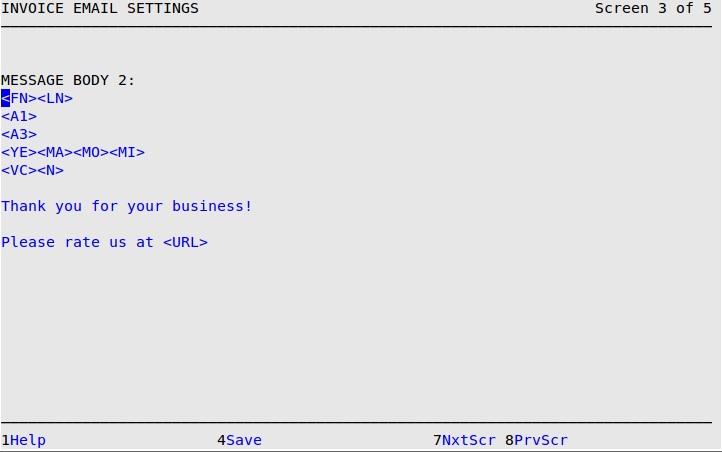
Message Body
Enter text and codes for the body of the invoice emails sent to customers. You may enter up to 17 rows of text.
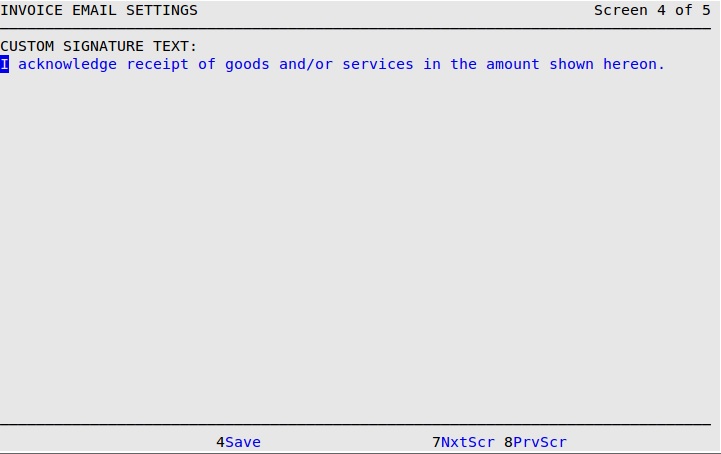
Custom Signature Text
Enter text or leave blank to use the default card holder message. The text is printed near the signature line on Plain Paper Invoices and displayed when collecting customer signatures in Mobile Cashier and Mobile Signature Capture. The default message is: Cardholder acknowledges receipt of goods and/or services in the amount shown hereon and agrees to perform the obligations set forth in the Carholder’s agreement with the issuer.
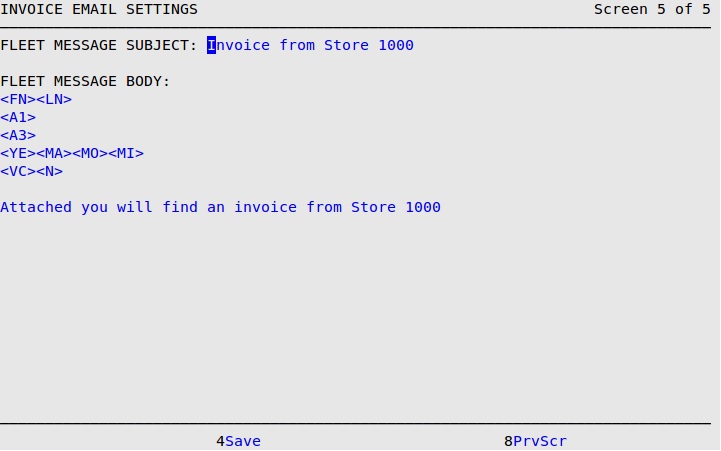
Fleet Message Subject
Enter the text you would like to appear in the subject line of each email sent to fleet customers.
Fleet Message Body
Enter text and codes for the body of the invoice emails sent to fleet customers. You may enter up to 17 rows of text.