Overview
The following instructions will guide you though setting up a new thin client, or checking BIOS configurations for commonly sold thin clients using ISI LubeSoft.
Zotac CI331
- Power on the thin client and immediately press [Delete] or [Del] key repeatedly to access the BIOS.
- Using the arrow keys, navigate to the “Features” tab.
- Select “Network Stack Configuration” and press [Enter].
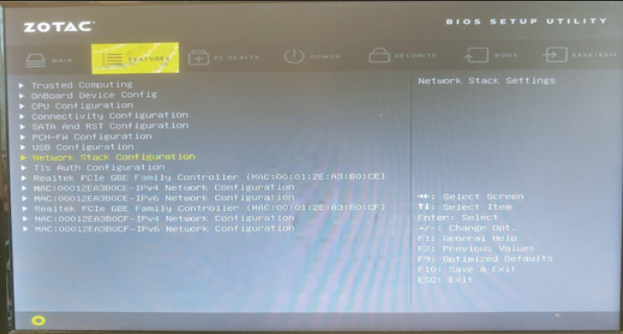
- Ensure ”Network Stack” is enabled.
- Ensure ”IPv4 PXE Support” is enabled.

- Press [F10] to “Save & Exit” and reboot.
Zotac CI329, CI327, CI325. CI323, and CI320
Note: If using the Zotac ZBOX CI325 Nano thin client, ensure Boot Option #1 is set to “Realtek PXE B02 D00”.
- Power on the thin client and immediately press [Delete] or [Del] key repeatedly to access the BIOS.
- Using the arrow keys, navigate to the “Boot” tab.
- Arrow down to “Boot Mode” and press [Enter].
- Select ”Legacy Only” and press [Enter].

- Confirm that ”OS Selection” displays “Windows 8.X”, if available.
- Arrow down to ”Launch PXE Option Rom” and press [Enter].
- Ensure it is set to “Enabled”.
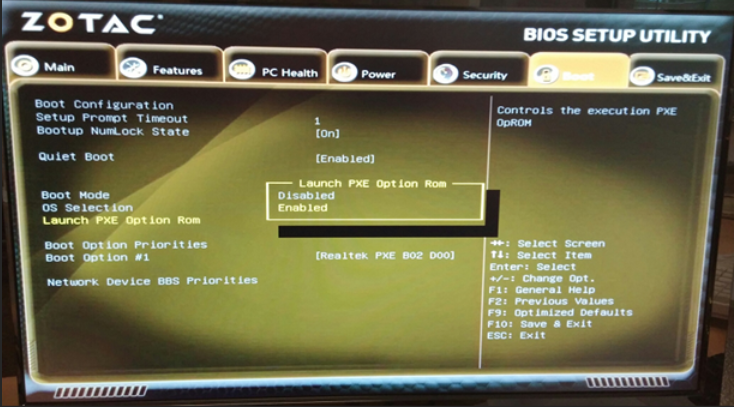
- Press [F10] to “Save & Exit”.
- Press [Enter] on “Yes” to reboot.
JrMX-Mini BIOS Configuration (Type 1/Older)
- Power on the thin client and immediately press [Delete] or [Del] key repeatedly to access the BIOS.
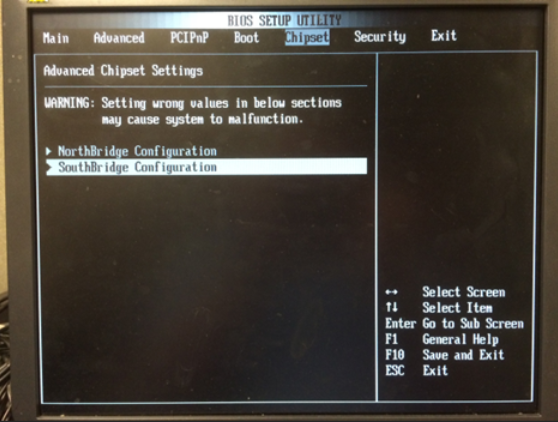
- Using the arrow keys, navigate to the “Chipset” tab.
- Arrow down to “SouthBridge Configuration” and press [Enter].
- Arrow down to “LAN Configuration” and press [Enter].
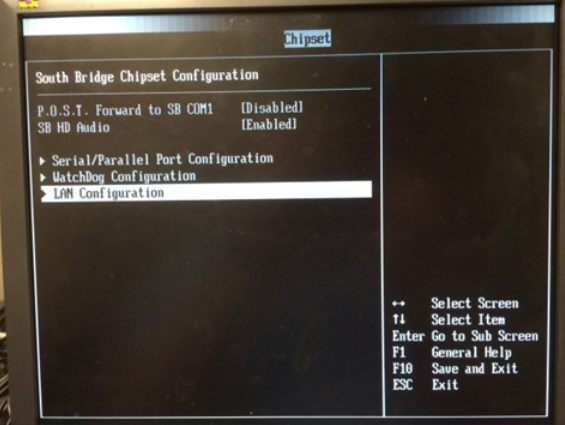
- Ensure that “SB LAN” is set to “Enabled”.
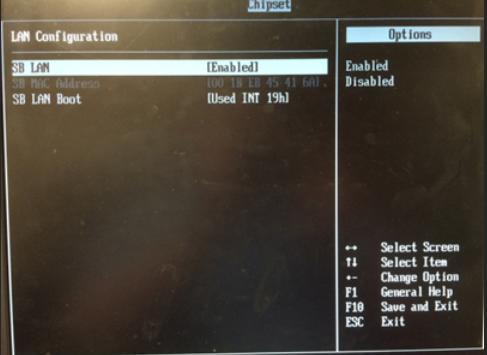
- Arrow down to “SB LAN Boot” and ensure that “Used INT 19h” (preferred choice) or “Used INT 18h” (secondary choice) is selected.
- Press [F10] to “Save & Exit”.
- Press [Enter] on “OK” to reboot.
JrMX-Mini BIOS configuration (Type 2/Newer
- Power on the thin client and immediately press [Delete] or [Del] key repeatedly to access the BIOS.
- Using the arrow keys, navigate to the “Advanced” tab.
- Arrow down to “SB LAN Boot” and press [Enter].
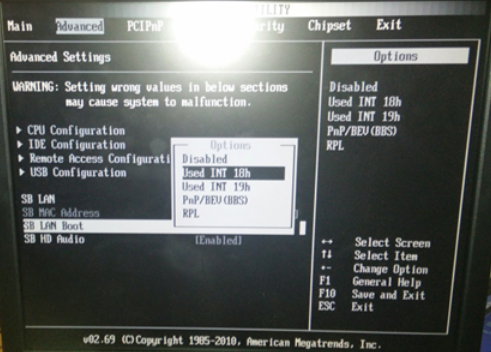
- From the list of options, using the -/+ keys, select “Used int 19h” and press [Enter].
- Press [F10] to display the “Save” box.
- Press [Enter] to exit the BIOS and reboot.