The Purchase Order (PO) Module gives you easy control over your entire inventory and ordering process. It allows you to create purchase orders to send to vendors and to receive inventory into your LubeSoft® system. You need a computer mouse to navigate the PO Module.
There are two different portions of this module: 1) Purchase Order Worksheets (POWs) and 2) Purchase Orders (POs). POWs are electronic worksheets that allow you to create and edit your inventory orders. Think of them as electronic scratch pads. Once you have finalized what you want your completed order to include, you convert your POW into an official Purchase Order (PO) with the simple click of a button. POs are the actual document you send to your vendor with the items and quantities you need to order.
There are three setups you must complete before you can begin using the PO Module. Setups should be completed in the following order:
| Note: | If you have already set up your system to use the Purchase Order Module, go to the Using the Purchase Order Module article. |
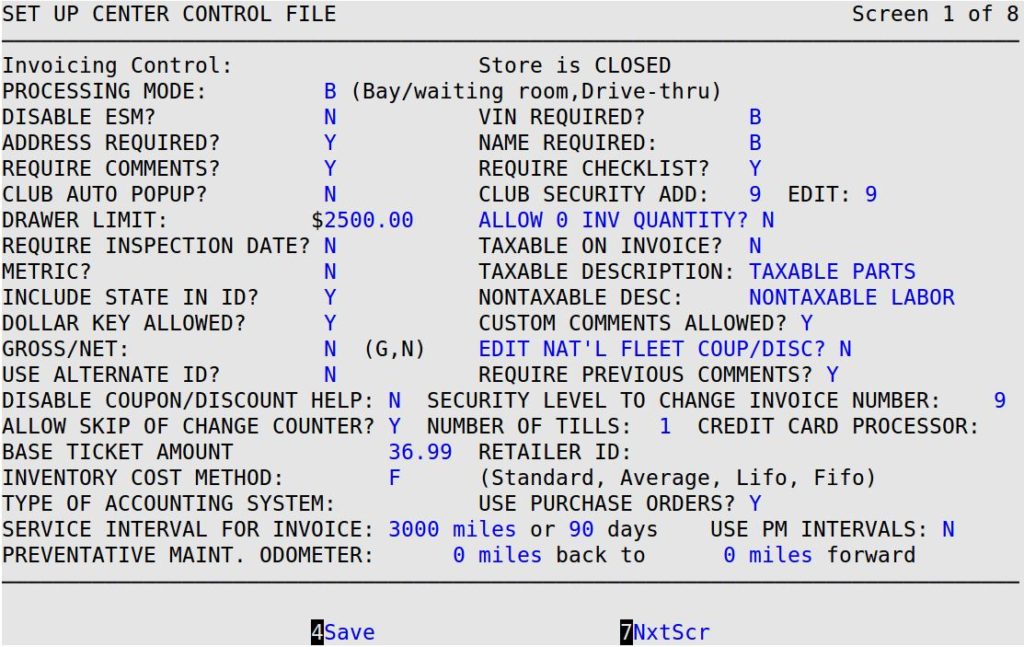
You must enable the PO Module in the Center Control File.
Use the following steps to turn on the module:

The Set Up Vendors (1-7-5-5) screen allows you to set up a new vendor, edit information for a current vendor, or link a vendor with an inventory item. Vendors must be set up on this screen to be accessible on the PO Module dropdown lists. See the Setting Up Vendors article for detailed instructions, then go to the next section to set up the inventory items that will be used with the PO Module.
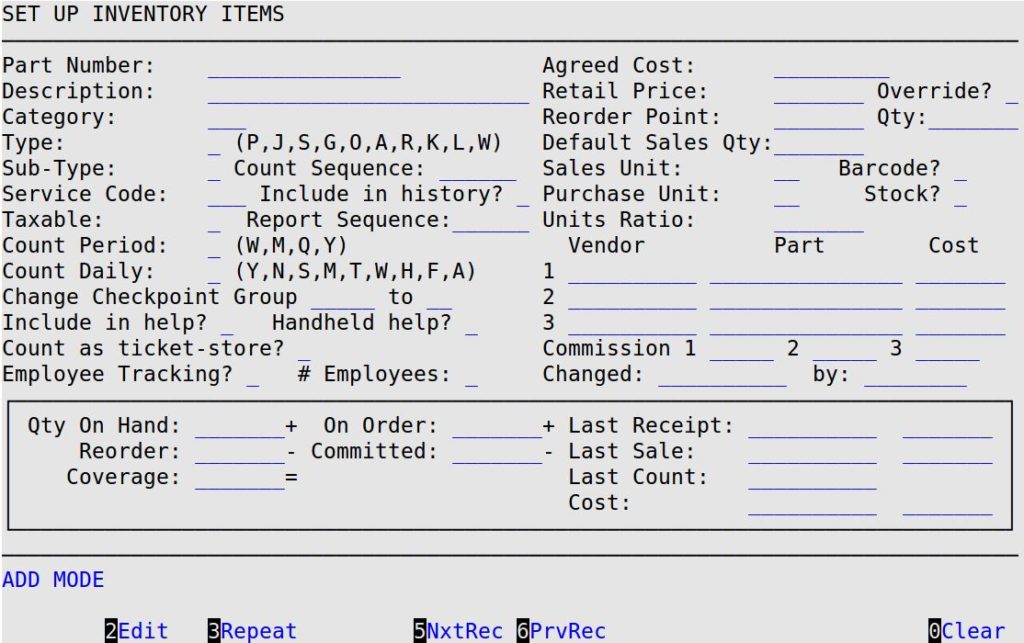
The Set Up Inventory Items (1-7-5-1) screen is used to specify the characteristics of an inventory item. For the purposes of the PO Module, this screen is used to make sure the vendor in the primary Vendor field on the Set Up Inventory Items screen is the same as the Vendor ID field on the Set Up Vendors screen (see the Setting Up Vendors article.)
Use the following steps to access the Set Up Inventory Items screen:

| Note: | The primary vendor (Vendor 1) on the Set Up Inventory Items screen and the vendor ID on the Set Up Vendors screen must match. |