Following are instructions on how to complete all of the setups needed for the Estimating functionality to work correctly. Setups relating to the Estimating functionality should be completed in the following order:
| Note: | The information in this article simply duplicates information from several different articles. It is intended to show you all of the components necessary to set up the Estimating functionality in one article. |
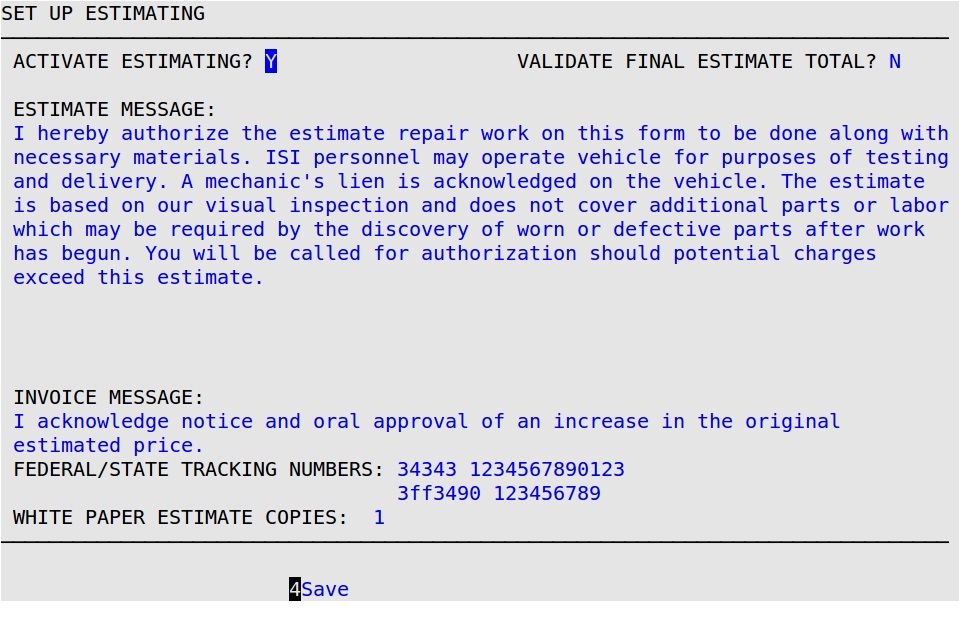
Use the following steps to activate the Estimating functionality so that it will work during invoicing:

Activate Estimating
Type Y to turn on the Estimating function during invoicing.
Validate Final Estimate Total
Type Y to require LubeSoft to verify that the final Invoice with Estimate total does not exceed the approved Estimate amount before the Send to Cashier prompt.
Estimate Message
Type an Estimate message similar to the example shown above.
| Note: | To move from line to line, press [Enter]. |
Invoice Message
Type an invoice message similar to the example shown above.
| Note: | To move from line to line, press [Enter]. |
Federal/State Tracking Numbers
Type up to two 25-character state or federal tracking numbers and descriptions similar to the example shown above.
White Paper Estimate Copies
If you are using one of the plain paper estimate types, enter the number of copies you want to be printed.
Use the following steps to set up estimating comments that will print in the comments area of the printed Estimate:

| Note: | If you want to make an estimate comment that exceeds 30 characters, use two lines. During invoicing, the bay technicians must select both estimating comments in the correct order. For example, you could type Left Front A Frame Bushings on line 9 and Need Replacing on line 10. |
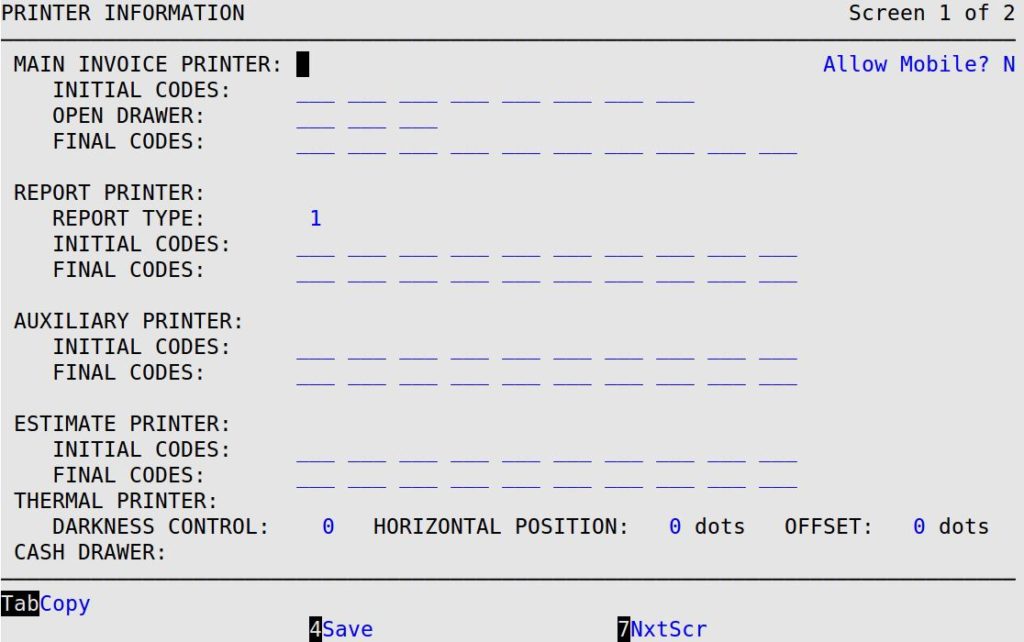
In order for your Estimate to print correctly, you will need to set up information specific to the Estimate printer.
Use the following steps to set up your Estimate printer information:

Estimate Printer
Fill in this field to send the Estimate output to the correct printer. Your Estimate printer can be plugged in to a terminal, a bay client, or a computer. For example, if the estimate printer is plugged into a computer parallel port, type /dev/lp0 in this field.
Estimate Printer Initial Codes
Fill in this field to have the Estimate print correctly when it gets to the printer. The codes allow the output to flow to the printer and set the printer to the correct number of characters per inch. Type 27 and 48 as the default numbers in this field.
Estimate Printer Final Codes
Leave this field blank.