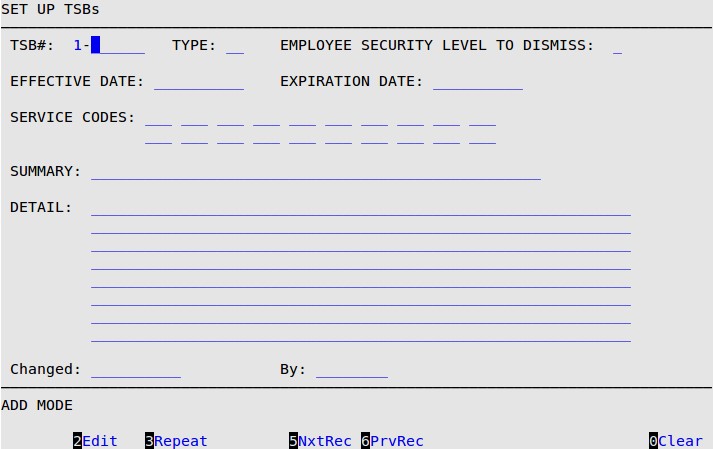
This screen is used to add or edit a Technical Service Bulletin (TSB).
Use the following steps to receive the Set Up TSBs screen:
| Note: | If you use this feature, each year you should check your current TSBs and adjust them to include new year vehicles. If a TSB is set up to include all years, it will automatically include the new year vehicles. However, if you have set up the TSB for a specific year range, you will have to change the ending year to the new year if you want the TSB to appear for the new year vehicle. |
| Note: | To edit a TSB, see the Editing or Deleting a TSB section later in this article. |
| To | Do |
|---|---|
| Repeat information from the previous TSB in all fields except Summary and Detail. | Enter a new TSB number and press [F3]. |
| Copy the information from another TSB. | Enter a new TSB number. Press [F5]. Enter the TSB number that you want to copy this information from in the popup that appears. |
TSB #
Your system automatically fills in the first digit of this number (the number before the hyphen), indicating the level at which the TSB was created.
Codes:
| Note: | To set your O.I.L. Central location to the corporate level, call ISI Customer Support. |
You can only add or edit TSBs generated at the level of your location.
Enter the number of the TSB after the hyphen. This unique number can be between 1 and 999999. However, you may want to consider how you assign numbers to your TSBs, which always appear in numerical order. The flexible numbering system allows you to prioritize your TSBs in the best way for your business. For example, you may want your most critical TSBs to be numbered from 1 to 500, or you may want to assign from 1000 to 1999 to a full service.
LubeSoft fills in zeros to make the TSB# six digits. For example: if you enter 11, the number appears as 1-000011 on your screen.
| Note: | Once a TSB has been added and saved, the TSB number cannot be changed. |
Type
The system automatically fills in a U (user created) for the TSB Type. (Display only)
Employee Security Level to Dismiss
Enter a security level (1-9) to require an employee to enter their password before this TSB Popup can be closed during invoicing. (Defaults to 0)
 |
CAUTION: An employee must be set up with a security level equal to or higher than the TSB dismiss level. If no employees at the store have sufficient security clearance, the work order cannot be invoiced! For more information, see the section Using Employee Security Level to Dismiss. |
Effective Date
Enter the date you would like the TSB to begin displaying during invoicing. (Defaults to the current date).
Expiration Date
Fill in the date you would like the TSB to expire. Expired TSBs are cleared from the system during the monthly close. If no date is entered, the TSB never expires.
Service Codes
Enter service codes to indicate you want this TSB to only appear for the specified services. The codes in this field refer to those specified in the Services Performed field on screen 3 of the Center Control File (1-6-1-1). See the article Setting Up the Center Control File for more information.
Summary
Enter a one line description of the TSB. This appears on the TSB popup screen during invoicing as well as on both the summary and detailed versions of the TSB List and the TSB Vehicle List.
Detail
Fill in the detailed information for the TSB. Press [Enter] at the end of each line to move to the next line. If you reach the last line of the Detail field and need more space, press [Enter] to receive an additional page. You can enter up to 92 lines.
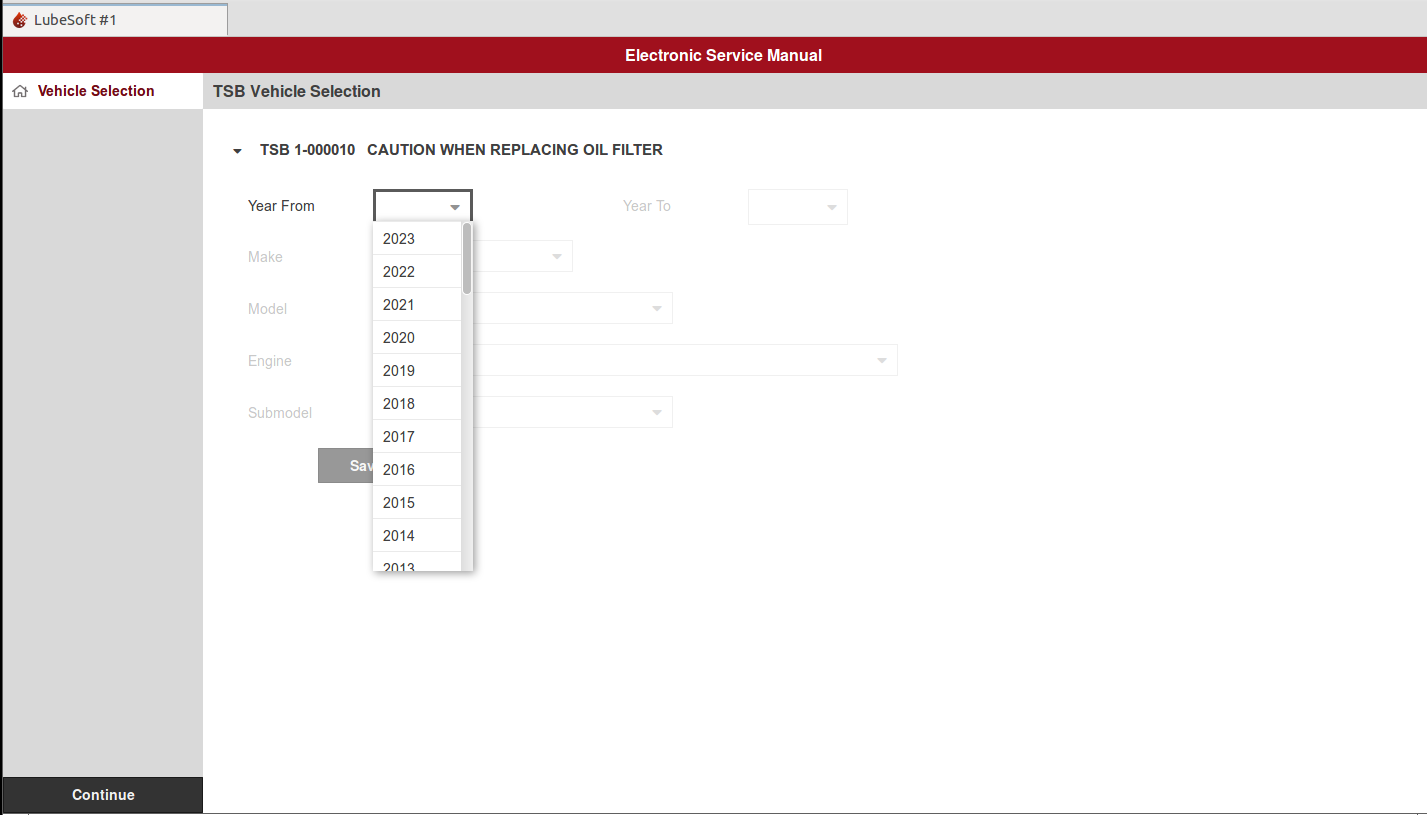
TSB#
The system automatically transfers the number you entered in the previous screen. (Display only)
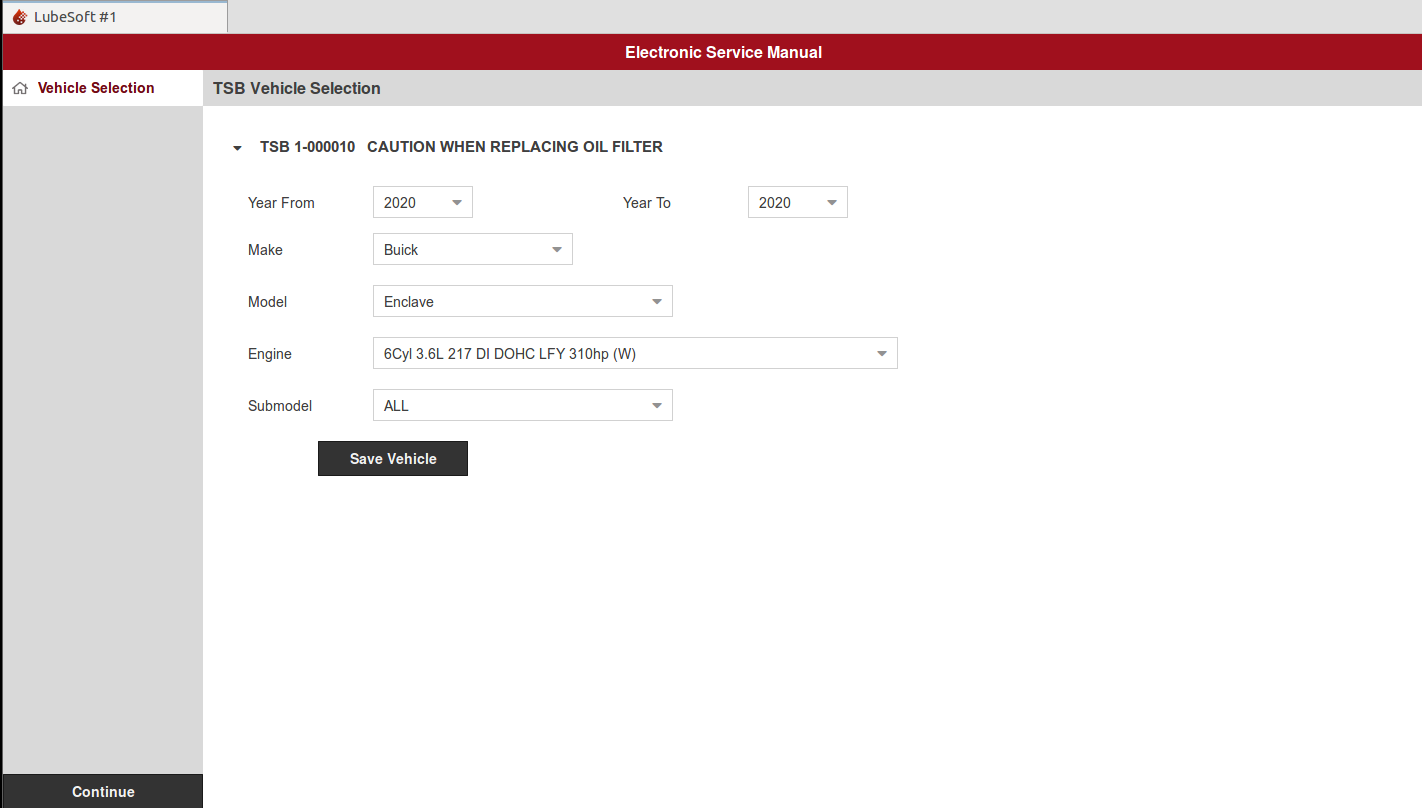
Years
Enter a range of years for the vehicle. You can choose a specific year by entering the same year on both lines. (Defaults to all years)
Make
After you have selected the Years, Make and other fields become available. Select the make of the vehicle.
Model
Select the model of the vehicle.
| Note: | If you have entered a range of years in the Years field, the system automatically enters ALL in the Engine field. If you have entered only one year in the Years field, the system displays the Engine dropdown for you to choose the engine type. |
Engine
Select the number of the engine of the vehicle in the dropdown.
Submodel
Unless the TSB is applicable for more than one submodel, select “ALL”.
| Note: | Vehicles attached to TSBs must be in the ESM. You cannot attach a manual vehicle or a new year vehicle to a TSB. |
9. Press the “Save Vehicle” button to save the vehicle.
Use the following steps to change the information in a TSB, attach another vehicle to a TSB, or delete a TSB:
The following chart contains additional command line options available in Edit Mode.
| Press | To |
|---|---|
| [F5] | Attach additional vehicles to the TSB. |
| [F6] | Display a popup listing all vehicles attached to the TSB. For more information, see the Using the Vehicle List Popup section below. |
| [F8] | Search for TSBs by key word. For more information, see the Using the Key Word Popup section later in this article. |
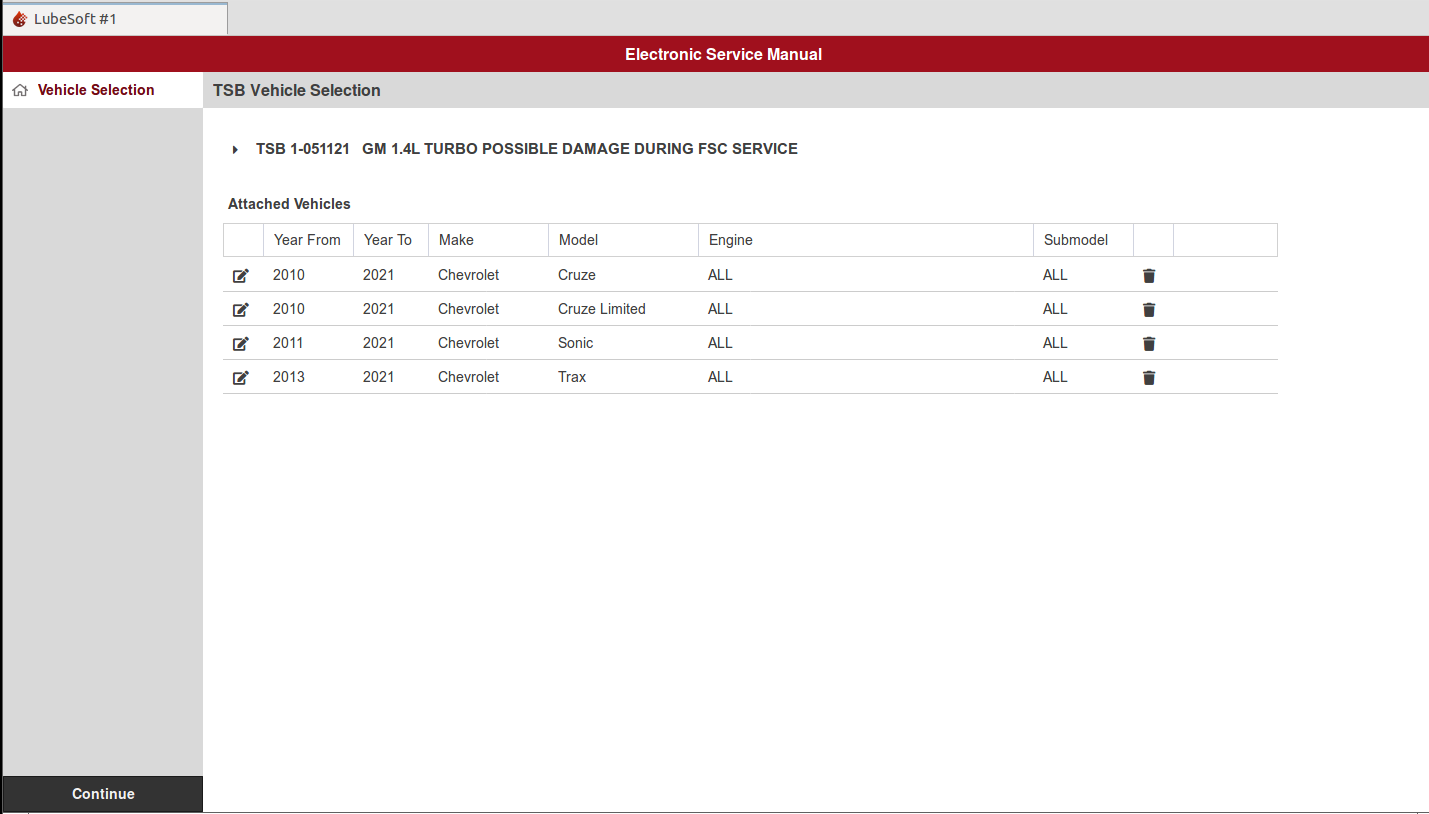
In Edit Mode on the Set Up TSBs screen, press [F6] to access the Vehicle List Popup. This popup lists all vehicles attached to a specific TSB.
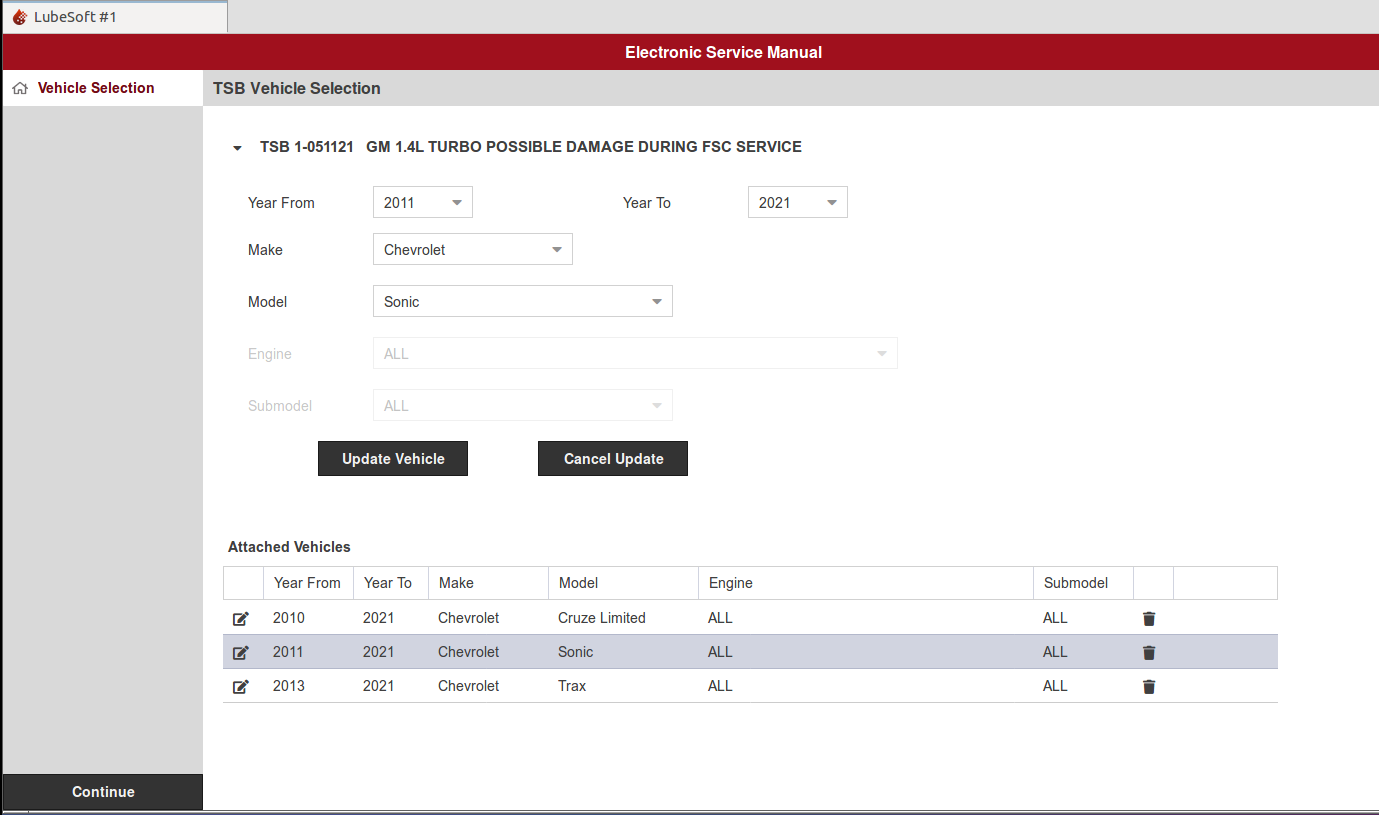
Using the Key Word Popup
This popup allows you to search for a specific TSB by entering a key word.
This feature reduces the chance that an employee will automatically close a TSB without reading it. If a TSB has a number greater than 0 in the Employee Security Level to Dismiss field, when a work order is started for a vehicle with that TSB attached, then you see a TSB Popup similar to the screenshot below.
The lock icon on the Close button indicates that an employee password is required to close out of the popup.
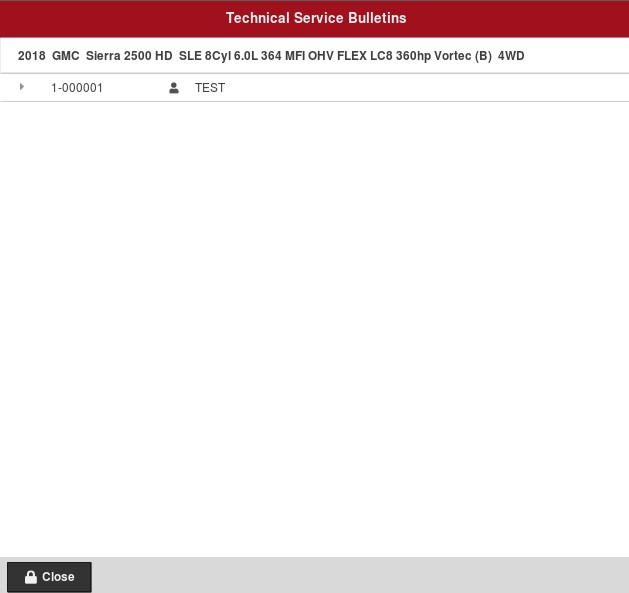
Click the Close button to continue to the employee password prompt.
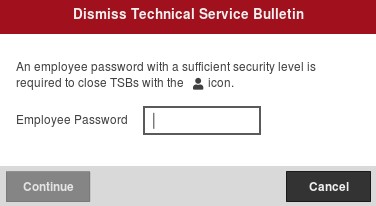
An employee with a security level equal to or higher than the TSB dismiss level must enter their password.
| Note: | If check-in is required for the employee and they are not clocked in, you see the message Employee is not checked in. Have the employee clock in or use a different employee password. |
If no employees present have sufficient security clearance to close the TSB popup, you will not be able to continue invoicing the vehicle or delete the work order. Refer to the article Setting Up Employees for help with employee setups.