The desktop Graphical Service Review application setup functionality has been removed and replaced with a new setup option in the LubeSoft menus. See the article Setting Up the Service Review for more information.
The Graphical Service Review (GSR) is designed differently than what you are used to using in LubeSoft. The graphical design of the GSR software makes many tasks easy to learn, but there are still a few points that will help you use the GSR to its fullest capabilities.
![]()
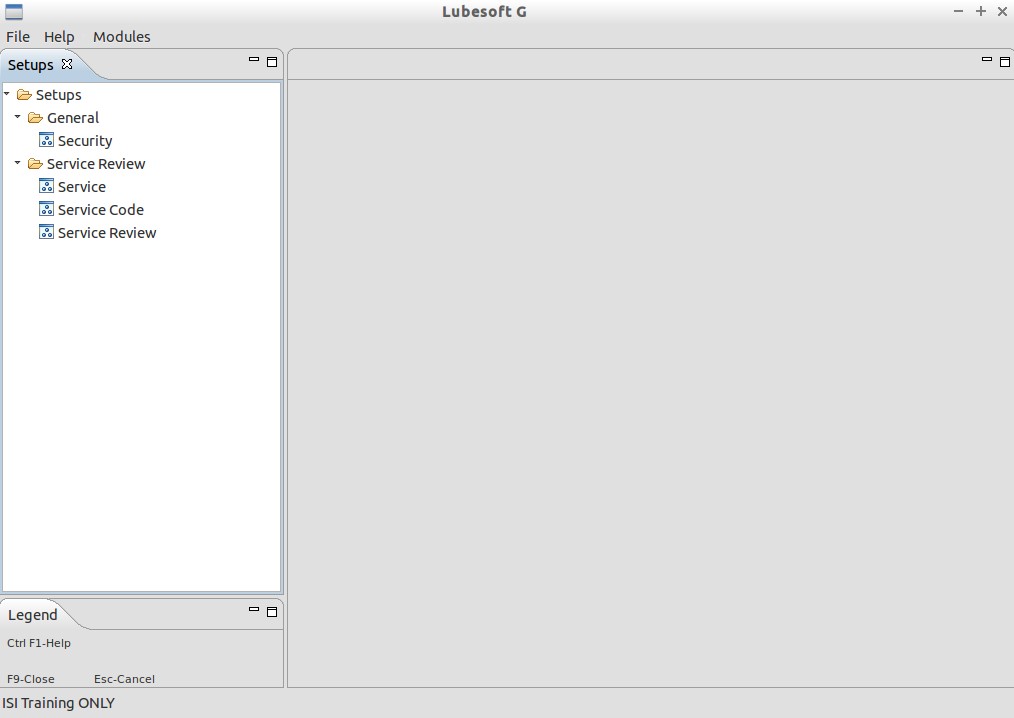
You can access the help and setup menus by clicking on the corresponding menu bar heading at the top of the screen. The GSR menu bar headings consist of a title and a list of choices, which access different areas of the system. For example, when the Modules menu bar heading is clicked, it displays the option Setups.
Use the following steps to access the GSR setups:
| Note: | The employee security level required to access the Setups can be changed in the Security setup screen. Defaults to 6. |

| Menu Option | Function |
| Service | Set up or edit a service that displays on the service review graph and/or service review form. |
| Service Code | Create or edit service codes and their descriptions. |
| Service Review | Customize the service review graph and form. |
| Security | Edit the employee security level required to view and/or edit the GSR menu options. |
The Service screen has two parts: Service List and Service Detail. Highlight a service in the Service List, then edit the setups for that service in the Service Detail section. After modifying a service, you must press [F4] to save or [Esc] to cancel your changes before you can modify another service. To create a new service, press [F2]. To delete an existing service, press [F3].
| Note: | Only user-defined services can be deleted. There are 21 ISI-defined services that cannot be deleted. |
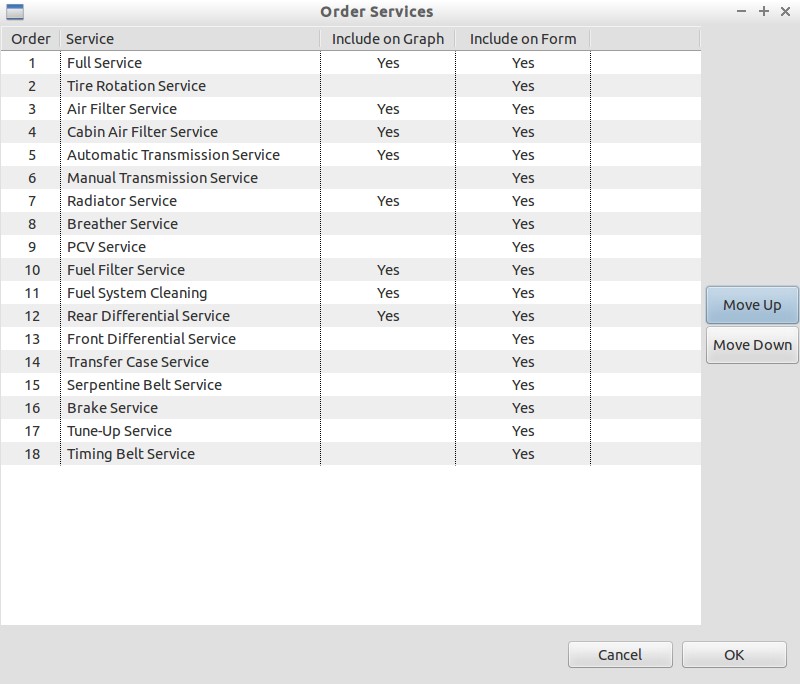
Use the Order Services… button to open a popup where you can set the display order for services on the form and graph. Click OK to save your changes or Cancel to ignore them.

For each service, fill in the following fields:
Description
Fill in a brief description of the service.
Benefit File Location
Fill in the location of the file used for the Service Review Benefits View. Or use the Browse button to navigate to the file and select it. Click the Preview button to see how it will look in the Benefits View.
Price Description
Enter a price or description for the service, up to 15 characters. For example, $15.99 & up. This data is displayed on the graph and form.
Show Item Price
The Air Filter, Cabin Air Filter, Fuel Filter, Breather, and PCV Services can be set to automatically display the price of the ESM-recommended inventory item when it is in stock by checking the Show Item Price checkbox.
Include on Graph
When this box is checked, the service will print on the service review graph. No more than eight services can be selected, so the graph does not exceed one page in length. If eight services are already selected, you will not be able to check this box until you uncheck it for another service.
Include on Form
When this box is checked, the service will print on the service review form. There is no limit to the number of services included on the form.
Recommendations
OEM recommendations are available for many services and vehicles. They are based on either severe or normal vehicle operating conditions. Select one of the options explained below to determine the service recommendation intervals on the graph and form. When there is no recommendation, the service interval displays No OEM Service Recommendation.
| Note: | This option only affects the form. The graph can only accurately represent one recommendation per service so it will use the Severe/Normal option. |
| Note: | This option only affects the form. The graph can only accurately represent one recommendation per service so it will use the Severe/Normal option. |
Service Codes
Use the Add… and Delete buttons to change the service code(s) mapped to this service. This must match the service code set up in LubeSoft for the service item. See Setting Up Inventory Items for more information. If the service code you wish to select is not available, see the article Setting Up Service Codes for help. Each service code can only be mapped to one service, but services can have multiple service codes. For example, you could map FS, FS1, and FS2 to the Full Service.
The Service Code screen has two parts: Service Code List and Service Code Detail. Highlight a service code in the Service Code List, then edit the setups for that service code in the Service Code Detail section. After modifying a service code, you must press [F4] to save or [Esc] to cancel your changes before you can modify another service code. To add a new service code, press [F2]. To delete an existing service code, highlight it and press [F3].
| Note: | Service codes that are mapped to services can not be deleted. |
Fill in the following fields for service codes:
Service Code
Enter a unique service code, up to 3 characters.
Description
Enter a description for the service code.
These settings affect the appearance of the service review form and graph, such as the header, severe definition, and how many months or miles of service history/recommendations to display.
Fill out the following fields:
Service Review Header
Type the file path for the header file’s location on the computer. You can also use the Browse button to select a file instead of typing. The header prints in the upper left portion of the service review form and graph.
| Note: | If you need to create or edit the header, contact ISI Customer Support in the U.S. at (800) 252-3099 or in Canada at (800) 321-3099. |
Server Address
ISI recommends not changing this field.
Recommendation Sub Header
Enter text to print on the service review form at the top of the recommendation section.
Vehicle Selection Refresh Time
Enter the number of seconds to wait before refreshing the vehicle selection list. (Defaults to 10)
| Note: | The vehicle selection screen can be manually refreshed at any time, regardless of this setting. |
Print Severe Definition
Select whether to print a definition of severe driving conditions on the service review form.
Severe Definition Image
Type the file path for the image’s location. You can also use the Browse button to select a file instead of typing.
Severe Definition Placement
Select whether the severe definition is printed as a footer at the end of the service review form or as a header at the beginning of the recommendation section of the form.
Industry Source Recommendation Title
Select whether to display Manufacturer’s Recommendation or Owner’s Manual Recommendation on the History section of the LubeSoft G desktop application.
Store Recommendation Title
Enter text to display as a header on the History section of the LubeSoft G desktop application for services set to use store recommendations.
Use Months in Interval Calculations
Check the box to include date-based recommendation intervals on the service review in addition to the mileage-based recommendations.
Generate Default Date for Month Calculations
Check the box to set the default date to January 1st of the vehicle year when determining service recommendations. If unchecked, the oldest service history record is the default date.
Miles (KM) Before/After Current
Enter the number of miles/kilometers to display before and after the current odometer reading on the service review graph. For example, if you enter 20,000 mi/km in this field and a customer has 50,000 mi/km, the graph will display from 30,000 to 70,000 mi/km.
Miles (KM) When Service Due Soon
Enter the number of miles/kilometers between recommended customer visits for all services. Upcoming recommended services that fall in this range will be labeled as Due Soon and the bar on the service review graph will be yellow. For example, if you enter 3,000 mi/km, you expect a customer with an odometer reading of 118,000 to return at 121,000 mi/km. If LubeSoft finds any services due in this range, such as a manufacturer recommending a radiator flush at 120,000 mi/km, it will label the services as Due Soon and display a yellow bar for these services.
Months When Service Due Soon
Enter the number of months between recommended customer visits for all services. Upcoming recommended services that fall in this range will be labeled as Due Soon and the bar on the service review graph will be yellow. For example, if you enter 3 months, you expect a customer who visited on January 2nd to return on April 2nd. If LubeSoft finds any services due in this range, such as a manufacturer recommending a radiator flush next month, it will label the services as Due Soon and display a yellow bar for these services.
Print Form
Check the box to print the service review form when printing a service review from the Vehicle Selection screen and LubeSoft.
Print Graph
Check the box to print the service review graph when printing a service review from the Vehicle Selection screen and LubeSoft.
| Note: | If you check Print Form and Print Graph, the form and graph will both print when you choose to print a service review. |
Use the Security setups to edit security levels for all available setup options.
Fill in the following fields:
View Level
Select from the dropdown the security level an employee must have to be able to view the menu option.
Edit Level
Select from the dropdown the security level an employee must have to be able to edit the menu option.
| Note: | The edit level cannot be less than the view level. |
Function Password
Enter a 1- to 8-character password to allow an employee with a lower security level to access the setup option.