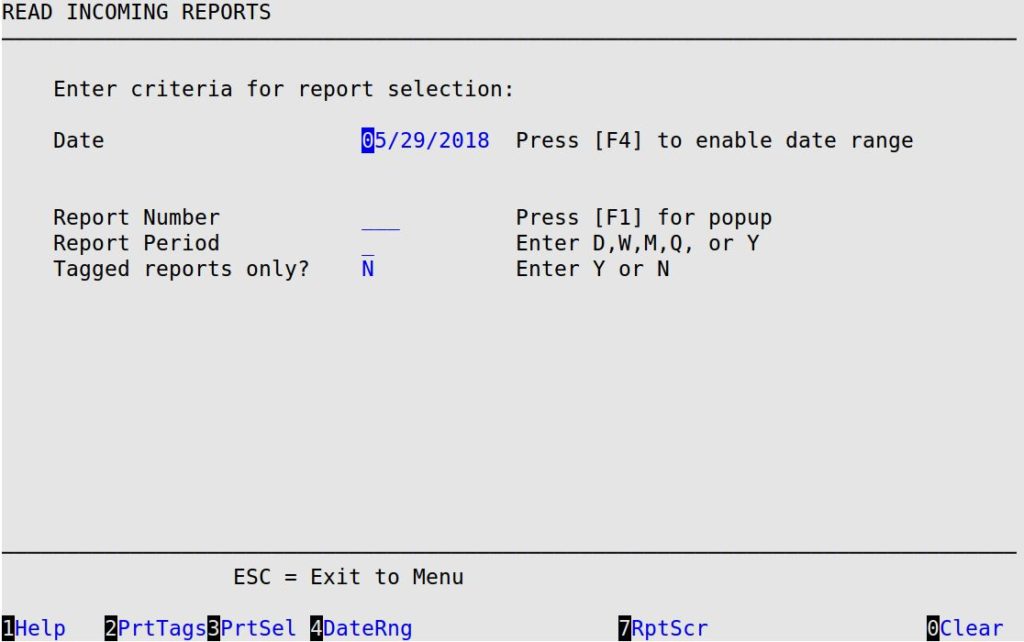
This option allows you to view or print any of the mail or reports sent to the store from the central office.
Use the following steps to view and print your reports:

| Note: | Be precise when you select criteria. The more criteria you enter, the fewer reports show up on the point-and-shoot screen. If you do not enter any criteria, all reports show up in the list (but the list may take several minutes to create!). You should enter a date or range of dates in order to place a reasonable limit on the number of reports selected. |
Date
This field defaults to yesterday’s date to allow you to review the reports received overnight. Press [F4] to turn the date range on and off. Type over the field to change the date.
| Note: | If you enable the date range option, you need to fill in the Date field with the beginning date in the date range and the End date field with the last date in the date range. |
Report Number
Press [F1] for a list of the reports that are available to print.
Report Period
Type a 1-character code to indicate the report period.
Codes:
D – Daily
W – Weekly
M – Monthly
Q – Quarterly
Y – Yearly
Tagged reports only?
Type a Y to list only previously tagged reports. Tagged reports are reports that are marked to print.
| To | Do this |
|---|---|
| Print all reports you have tagged | Press [F2]. You are prompted with the number of reports that were selected (if any) and given the chance to abort the printing before it begins. Type Y to print or N to abort. If at any time you want to stop printing, press a key and type Y when you receive the Do you want to abort printing? prompt. The tags are removed from the reports that were printed and left on the reports that were not printed. |
| Print the reports matching your selection criteria | Press [F3]. You are prompted with the number of reports that were selected (if any) and given the chance to abort the printing before it begins. Type Y to print or N to abort. If at any time you want to stop printing, press a key and type Y when you receive the Do you want to abort printing? prompt. The tags are removed from the reports that were printed and left on the reports that were not printed. |
| Receive the screen containing a list of reports matching your criteria | Press [F7]. The report that is currently selected is highlighted. |
| Note: | If there are no reports matching the selected criteria, you receive the following message: There are no reports matching selected criteria. Press [Enter] to return to the Read Incoming Reports screen. |
Use [↓] or [↑] to select the report you want to view, and press [Enter] to display the report on the screen. You can move around the report with the arrow or function keys. Press [F1] for a list of the function keys and their definitions.
| Note: | If the reports listed take up more than one screen, press [F7] or [F8] to scroll through them. |
Use the following steps to print reports from the Read Incoming Reports screen: