The Enter an Inventory Count option allows you to enter your physical inventory count in the computer.
Use the following steps to enter an inventory count:

| Note: | If you do not have time to enter the entire inventory count, you can escape out of the process, and then restart where you left off. The system saves all counts entered on previous pages, but not on the current page. We suggest that you fill out a page, and then press [Enter] to go to the next page before you press [Esc] [Esc]. |
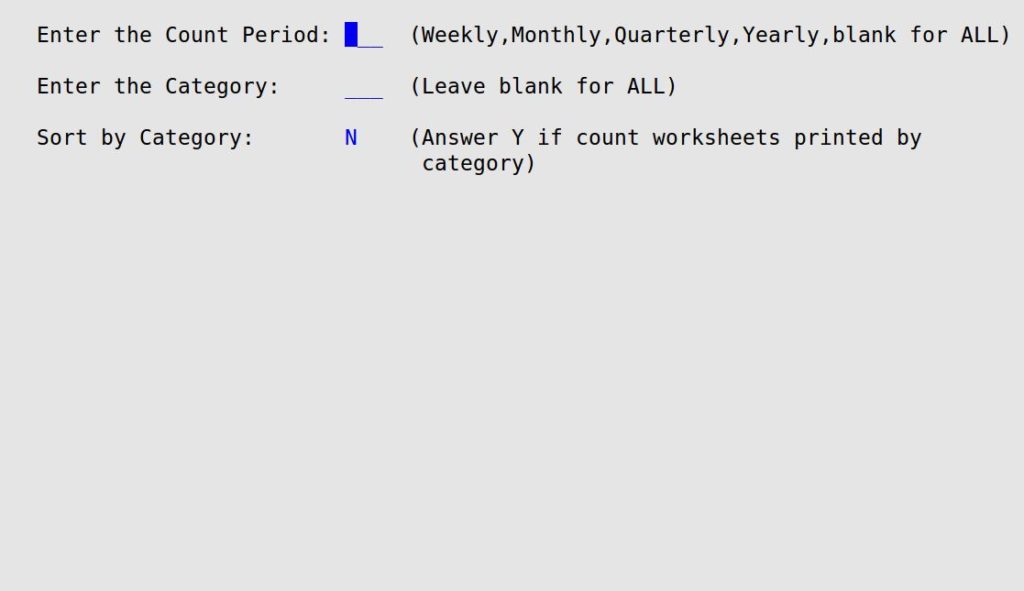
Enter the Count Period
To enter counts for a month, type WM; for a quarter, type WMQ. Leave blank to select all count periods.
Enter the Category
Select a category or leave blank for all categories.
Sort by Category
Only select Y if you are printing the Inventory Count Worksheet in the summary format. Selecting Y will match the category sort in the Enter an Inventory Count screen with the Inventory Count Worksheet so that the columns line up the same.

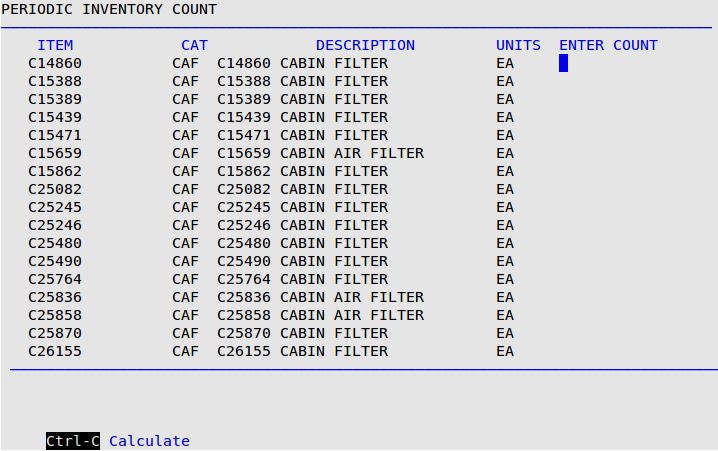
If you need to add numbers, press [Ctrl+C] to use LubeSoft’s built in calculator. This moves your cursor to the bottom of the screen. Type the numbers you want to add separated by a plus sign (+). Press [Enter] to place the total in the Enter Count field. After you use the calculator once, the command will not appear on the bottom of the screen, even though it is still active and you can use it.
The screen does not display what is actually on hand in the computer to prevent “short-cutting.” If the count you entered matches the on-hand quantity in the computer, the cursor moves to the next item. If the entered count and the computer’s quantity on hand do not match, the computer beeps and the cursor stays on the number that was entered. Check for an entry error. If there is not an entry error, and the number entered is the one you want, press [Enter] again and continue entering counts.