At the end of every day the center needs to be officially closed. This is done with the End of Day Menu option. Among other things, this process prints reports, purges old data, and compiles your statistics for the day.
Use the following steps to close your store:
| Note: |
Make sure all terminals, bays, and thin clients are at a login prompt before you begin the end of day process to close the store. |
- On the Main Menu, select Lubrication Menu.
- Select Start/End Day Menu (2).
- Select End of Day (2).
| Note: |
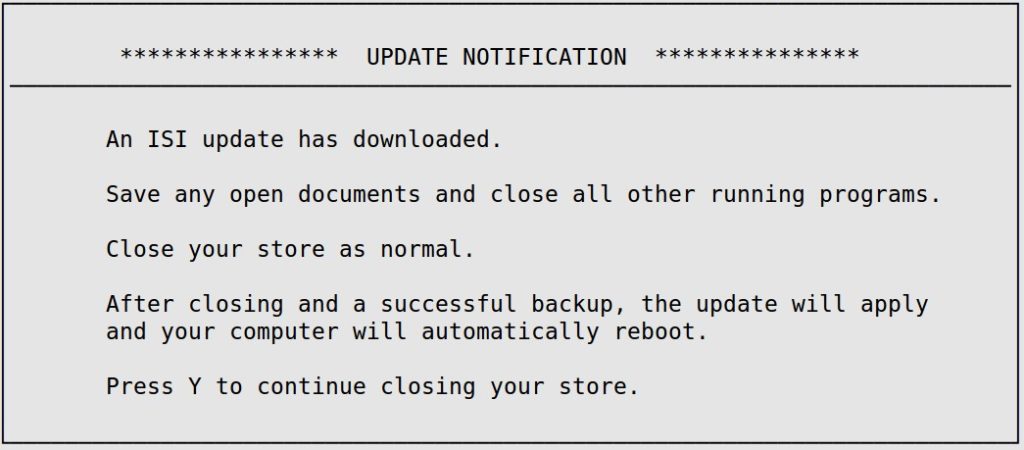
If an electronic update is ready to be installed, you receive the following screen. Read the instructions carefully, then press Y to continue with the store closing.
|
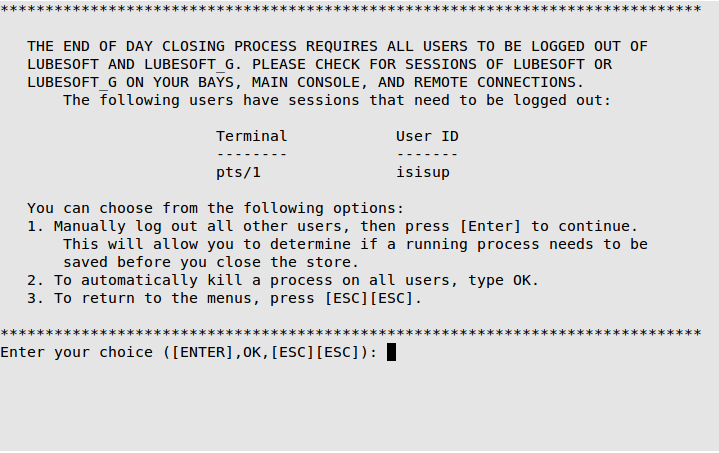
- You will receive the following screen if any users, other than the user closing the store, are still logged in to the system. Do one of the following:
- Manually log out all other users, then press [Enter] to continue.
- To automatically kill a process on all users, type OK. The following message will display on the screen: This option should only be used to kill processes you were unable to log out manually. Incorrect use of this option could result in damage to the integrity of your data, including loss of data. Type OK to continue or press [Esc][Esc] to abort.
If you type OK a second time, the following message will display on all screens: Store closing in progress. All users will be logged out in 25 seconds. If you press [Esc][Esc] to abort during the 25 second countdown, the following message will display on all screens: Store closing has been aborted.
- To return to the menus, press [Esc][Esc].
- The system automatically checks for any inventory that is sold out of stock. You will see the message Checking for items with negative quantity on hand.
| Note: |
If you have negative quantities on hand you receive the message The store cannot be closed with inventory items that have negative quantities on hand. Correct the problem, then close the store again. Do you want a Negative Quantity Report printed? (Y/N)
To print a list of all out-of-stock inventory items, type Y. You must receive the inventory items on the list so they are no longer out of stock, and then restart the closing process. For additional information, see the Inventory articles. |
- The system then checks to make sure you processed invoices today. If you try to close the store and you have not rung out an invoice during the day, you receive the following message. If you do not answer accurately, you could cause damage to your data.
Calculations show that there may be an inconsistency in your invoice database.
Have you processed any invoices today? _ (Y/N)
- The system also checks for inconsistencies between the invoice and statistics information on your system. If a problem exists, you receive the message Processing Statistics. . . Please Wait. The system reindexes your active POS files and corrects your statistics for the day.
- When the system has determined there are no negative quantities on hand and that your invoices and statistics databases are accurate, you receive the Till Closing screen, which allows you to type the ending amount for each cash till in your center.
| Note: |
To open your cash drawer during the End of Day processes, press [F3]. Only the till located on the bay doing the closing will open. If the close is done on a location without a till, no till will be opened. |
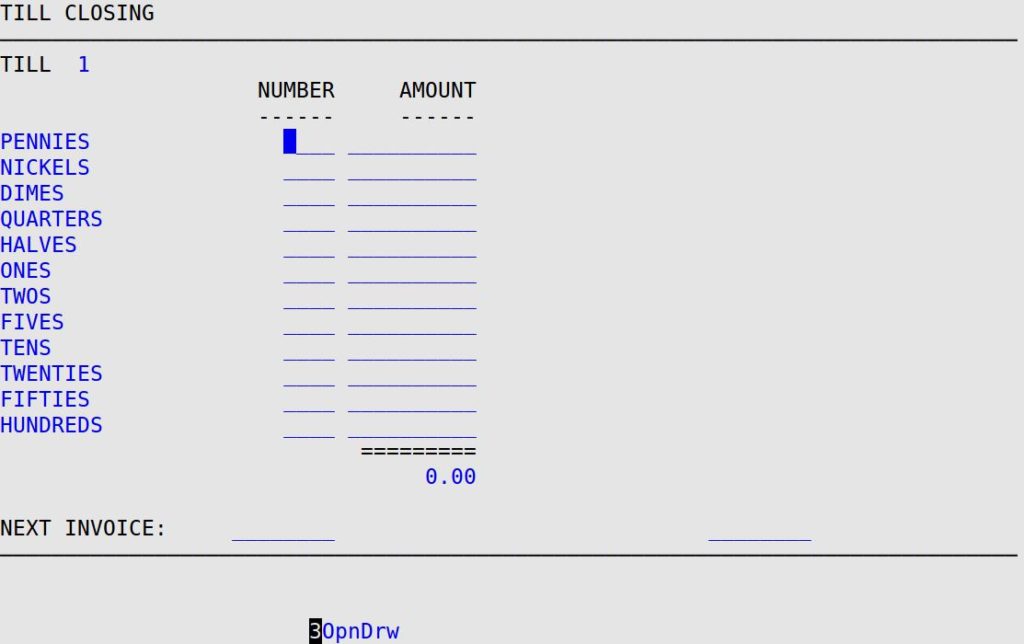
- Manually count the coins and bills, and type the counts in the corresponding Number column. The system automatically calculates the amount and enters it in the Amount column. The system then calculates the total cash in the till and fills in the Total Cash field.
- At the Employee Password prompt, type your employee password, and press [Enter]. Do one of the following:
- If you have sufficient user security access, you will move to the Next Invoice field. Proceed to step 11 below.
- If you do not have sufficient user security access, you will move to the Till Closing screen. Proceed to step 12 below.
- Type the invoice number (up to 8-digits) found on the next printed invoice, and press [Enter]. The invoice number is used to support the Invoicing Exception Report and to set the starting invoice number for the next day’s processing.
- You receive the Till Closing screen, where the ending till, beginning till and cash deposit information are displayed.
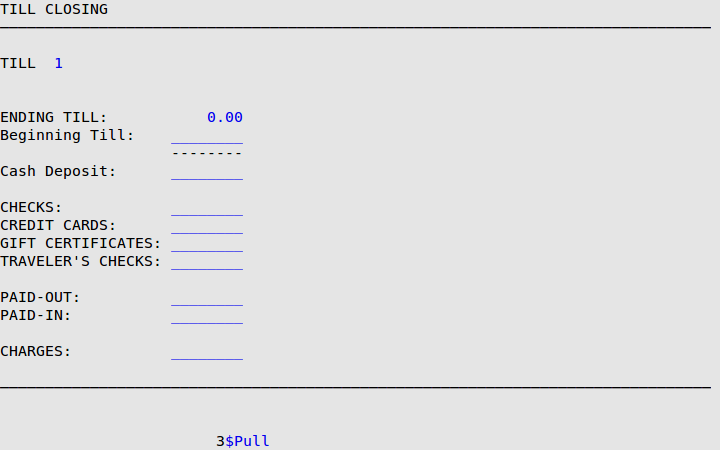
- Fill in the following information on this screen.
- Total amount of checks received.
- Total amount of credit cards received.
- Total amount of all redeemed gift certificates for the day.
- Total amount of all traveler’s checks for the day.
- Total amount of paid-outs entered for the day.
- Total amount of cash or checks received as paid-ins for payments on charge accounts or any other money received that did not go through the invoicing process.
- Total amount of charges for the day.
- After you fill in these fields, you receive the following screen.
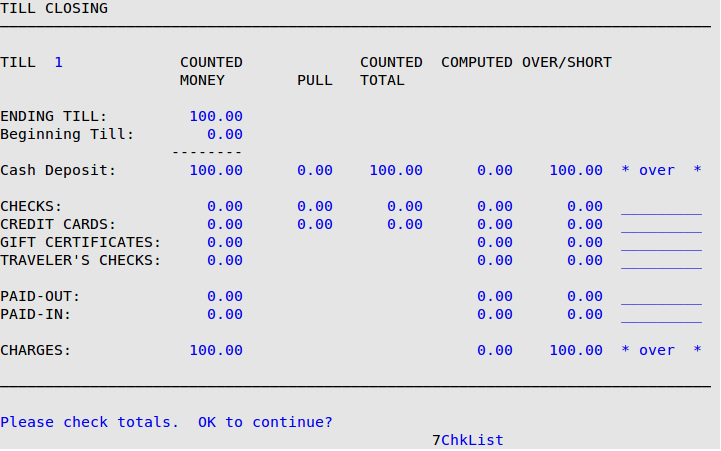
This screen compares the system’s count of till amounts with the counts you entered. This allows you to see what forms of payment were over or short. From this screen, you can press [F7] to print a check and credit card list.
| Note: |
A list of checks and credit cards automatically prints when the daily version of the Revenue Reconciliation Report is printed at closing. Make sure this report is set up in the Setting Up Closing Processes option (1-6-3). |
- Check the total amounts that are listed on the screen. The system saves any over or short amounts you have the first time through the process. These initial over/short amounts print on the Revenue Reconciliation Report.
| Note: |
The computer assumes that everything you entered in your Ending Till field was cash and increases the computed amount under Cash. If you have entered checks, cash and credit cards into the amount entered on your Ending Till field, subtract your Checks and Credit Cards Over/Short fields from the Cash Deposit Over/Short field to balance. |
- If you have two or more cash tills at your store, repeat steps 6-14 for each till. The screen for each till pops up automatically.
- Make sure your backup USB drive for the day’s closing is connected to the computer tower and all terminals are back to the login prompt. Check your reports printer to make sure it is set correctly, the power light is on, and enough paper is in the printer.
- Do one of the following:
- To return to the Till Closing screen to correct any entries, type N.
- To continue with your closing process, type Y to receive the following screen.
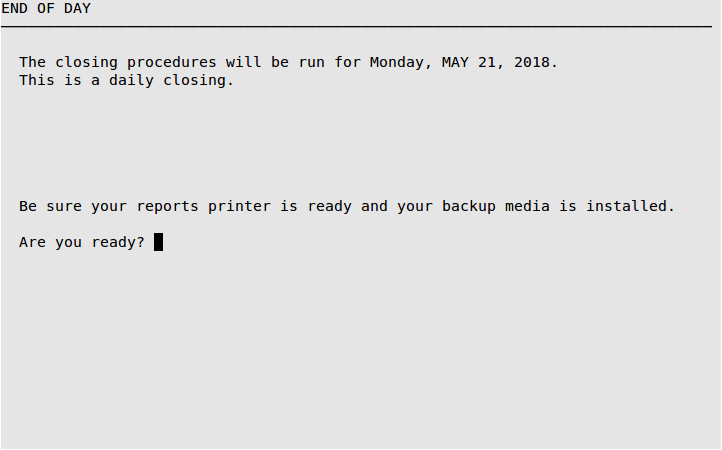
The statement on this screen depends on whether the system is undergoing a daily, weekly, monthly, quarterly, or yearly close. The system indicates the type of close it is preparing to do. The type of close is determined by your calendar setup. For more information about calendar setup, see the Setting Up the Calendar article.
- When you are ready, type Y and press [Enter] to start the End of Day process. The name of the report or procedure in progress appears on the screen.
| Note: |
If an employee did not clock out, and the Auto Checkout field on screen 3 of the Center Control File contains an N, you receive a prompt to clock out the employee. Type in the time the employee left, or press [Enter] twice to bypass the warning.
If you are part of a Central Office network, the Office Information Link Mail screen appears at this point to allow you to send mail to the Central Office. |
- When all the reports are printed and all the closing processes are completed, you receive the message The center is now closed. Press any key to continue.
- Press any key to return to the Start/End Day Menu.
| Note: |
When data is purged (old invoices, old statistics, etc.) during a weekly, monthly, or quarterly closing, a Clearing Report is printed.
We suggest you take the previous day’s backup off-site (somewhere away from the store) to protect your center’s data from theft or fire. Taking the previous day’s backup media gives you a secured backup from which to restore your center’s data if the need should arise. |
More Information About Money Pulls
The following instructions explain how to pull cash, checks or credit card slips from your cash drawer. Although this is usually used during the day, especially a mid-day till closing, it is available here for you to use.
- On the Cashier Station screen, press [F3] to receive the Employee Password prompt.
- Type your employee password, and press [Enter] to receive the money pull popup.
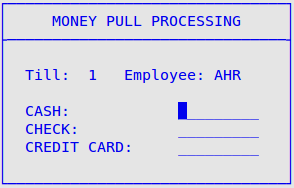
- Fill in the amount of cash, checks, and/or credit card slips you want to pull from the register.
- When you have entered everything you want to pull from the cash drawer, press [F4] to save the money pull information.
- When you receive the Open Cash Drawer? prompt, do one of the following:
- To open the cash drawer, type Y, and press [Enter].
- To leave the cash drawer closed, type N, and press [Enter].
- The Money Pull Processing PopUp stays on your screen to allow you to do another money pull until you press [Esc] [Esc] to return to the Till Closing screen.


