There are several offerings from ISI that will require your device to be established as a device on your Local Area Network wirelessly. This article will walk you through the process of configuring your wireless network.
| Note: |
This is not the procedure for configuring a customer accessible Wifi network. |
Setting up your network for wireless connectivity
Use the following steps to connect your device to the ISI Network:
- From your ISI Computer, open your web-browser (Firefox, Chromium etc…). You can normally get to the web-browser by clicking on the Firefox icon at the top of your screen or Chromium icon on your Desktop.
- Connect to the router or access point at your location:
- Type the IP address for the router or access point into the address bar of the web-browser and then press [Enter].
| Note: |
The IP address for an ISI router is 192.168.151.1 and the IP address for the access point is 192.168.151.180. |
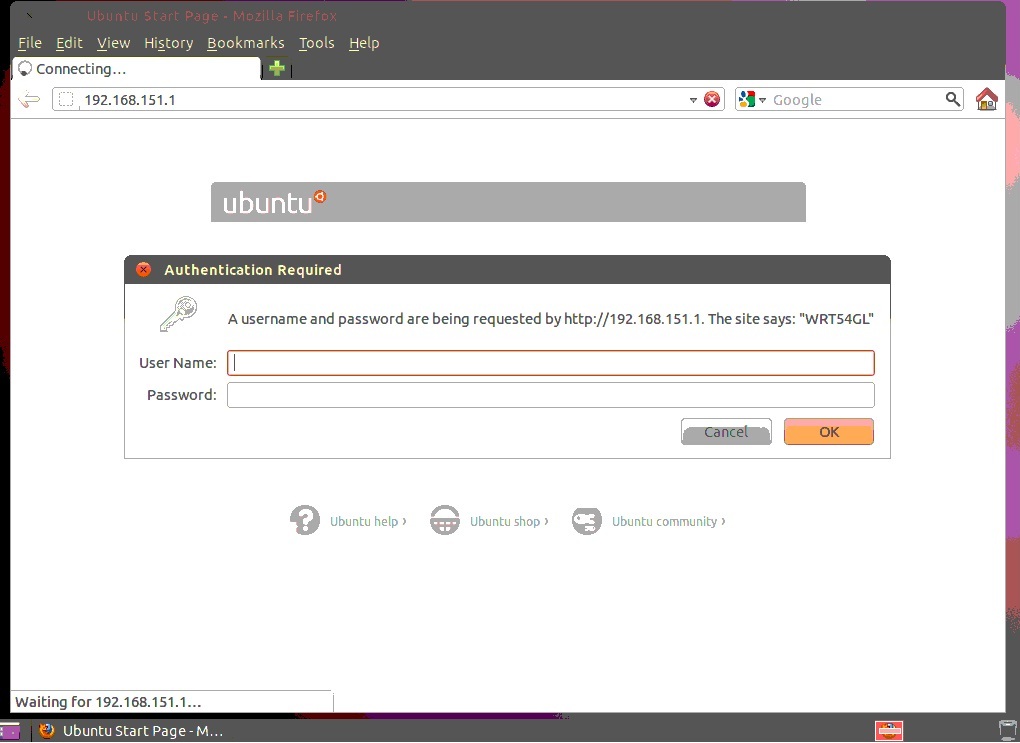
- You will be prompted to enter the username and password. Enter the information for your router or access point.

- Note:
|
If the username and password are still set to be the defaults then leave the username blank and enter the password of isiap1 |
- Check and write down the wireless settings below if you already have wireless access active.
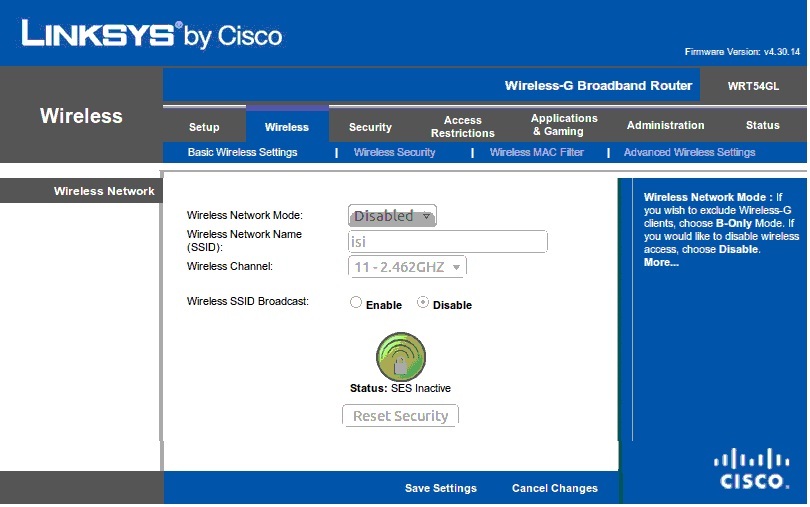
- If the Network Mode was set to Mixed, you already have an active wireless network.
| Note: |
If Wireless Network Mode is Disabled then skip to the section on setting up a wireless connection. An example of this is shown in the below picture. |
- Write down the Wireless Network Name (SSID).
- If you made any changes click on Save Settings.

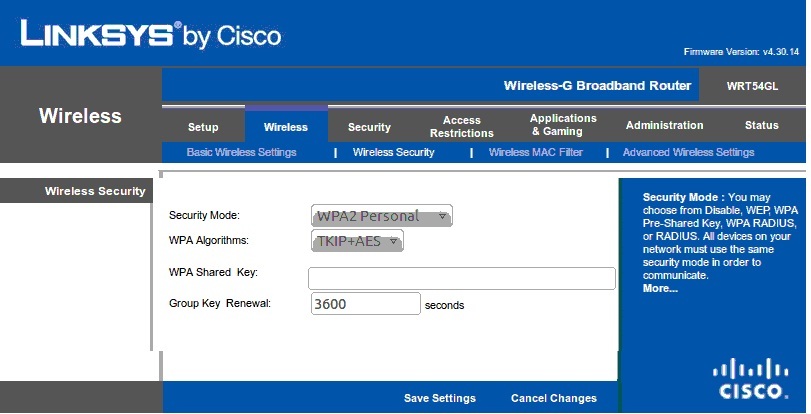
- Click on Wireless Security and verify that it is set to WPA2 Personal.
- Write down the Passphrase/WPA Shared Key.
- If you made any changed to the below page, click on Save Settings.

- You can now close the web-browser if you wish. Skip step 4 as your wireless network is already set up.
- Set Up your wireless connection for the first time (Use the images in the previous steps for reference).
- The Network Mode should be set to Mixed.
- Type whatever you desire to be the Network Name. The default Network Name is isi.
- Click on Save Settings.
- Next, click on Wireless Security.
- Set the Security Mode to WPA2 Personal.
- Type in whatever you desire to be the WPA Shared Key.
| Note: |
This will be the password to access your network wirelessly. It should not be easy for someone to guess. |
- Click on Save Settings. It is now safe to close the web-browser.


