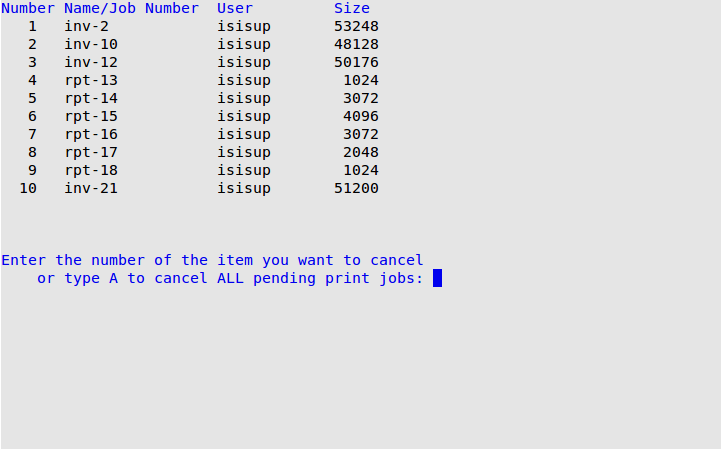
If you discover that you have sent a print job to the printer and you do not want to print it, you may cancel it with this function. The print jobs are listed in the order that the computer received the command to send them to the printer. The job that is currently printing is usually the first one on the list.
Use the following instructions to cancel a scheduled print job.

Number
The number the system assigns to the print job. Use this number when you specify which print job to cancel. (Display only)
Name/Job Number
The name of the printer and print job. The following list contains the standard codes for each of the printers on your system. Use these codes to help you determine which print job to cancel. (Display only)
User
The user ID of the person who printed the report. (Display only)
Size
The size, in bytes, of the report that is waiting to be printed. (Display only)