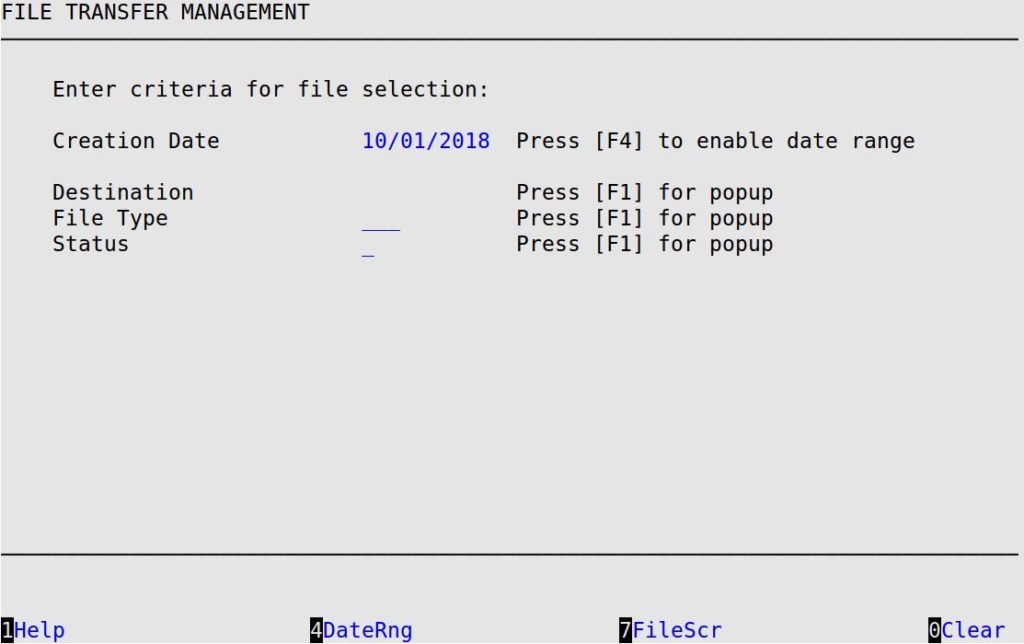
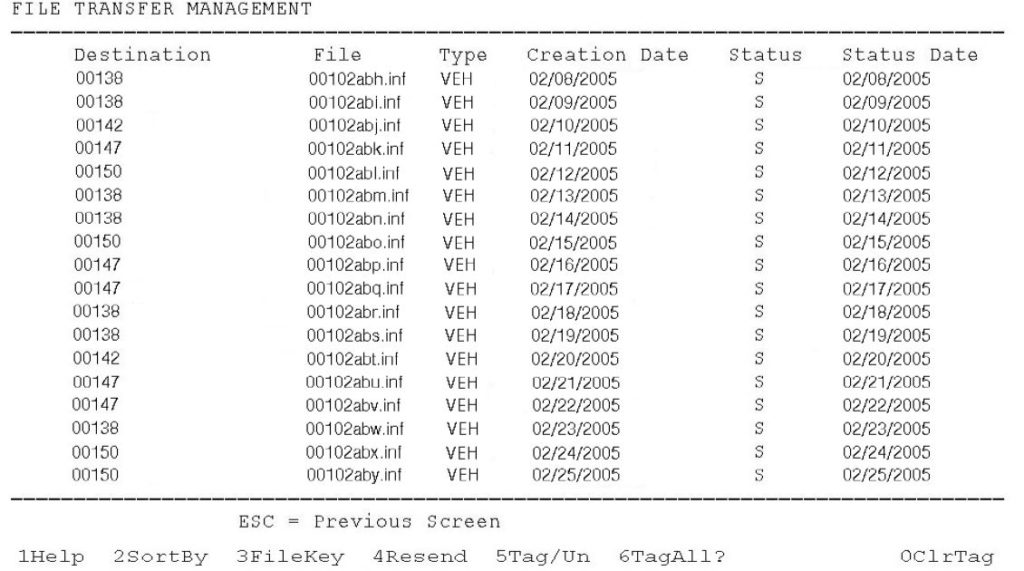
You can use the File Transfer Management option to track whether or not a file sent via e-mail was received by a store or central.
| Note: | Tracks files sent only by email. |
Use the following steps to track files:

Creation Date
Type the date of the files you want to see. For a date range, press [F4].
Destination
Enter the destination to see the files for just one destination. To see a list of destinations from which you can choose, press [F1]. Leave this field blank to see files from all of your destinations.
File Type
Enter the type of file you want to review. Each type has a 3-letter code (for example, SFF, VEH, or SHR). To see a list of the codes available, press [F1]. Leave this field blank to see all file types.
Status
Type C for created, S for sent, E for resent, N for all E, S, and C, R for received, D for deleted, M for manually selected for resend, or A for automatically selected for resend. Press [F1] to choose from a list.

| To | Do this | ||
| Select a file to tag or untag for resend | Press [↓] or [↑] to place the cursor to the left of the file you want to select, and then press [F5]. | ||
| Select all files for resend | Press [F6]. | ||
| Access the key of 3-letter file type codes | Press [F3]. | ||
| Copy the selected files to your outbound destination | Press [F4]. The next time the connection runs, the files are sent.
|
||
| Sort by the column headers | Press [F2] to receive a popup that gives you three different ways in which you can sort information
|
.