 |
This option should be used with extreme caution and only with assistance by ISI Customer Support. |
You should only use this option if you wish to change the entry in the Incl State/Prov in ID and/or the Use Alternate ID fields on screen 1 of the Center Control File (1-6-1-1).
Use the following steps to correct your vehicle IDs and licenses to make them more consistent:
| Note: |
This option can take a long time depending on the number of vehicle records in your system |
- Close your store for the day and make sure you have a good backup. You can check the status of your most recent backups by running the Disk Usage and Backup Report (1-3-6-1).
- Change the selections on screen 1 of the Center Control File (1-6-1-1) in the following fields: Incl State/Prov in ID and/or Use Alternate ID.
- On the Main Menu, select Lubrication Menu.
- Select Lubrication Utility Menu (8).
- Select Other POS Utilities Menu (6).
- Select Correct Vehicle IDs/Licenses (2) to receive the following screen. Read the warning on this screen carefully. If you do not understand the message, or if you are unsure whether you should use this feature, call ISI Support.

- Do one of the following:
- To abort the process, type N and press [Enter] to return to the Other POS Utilities Menu.
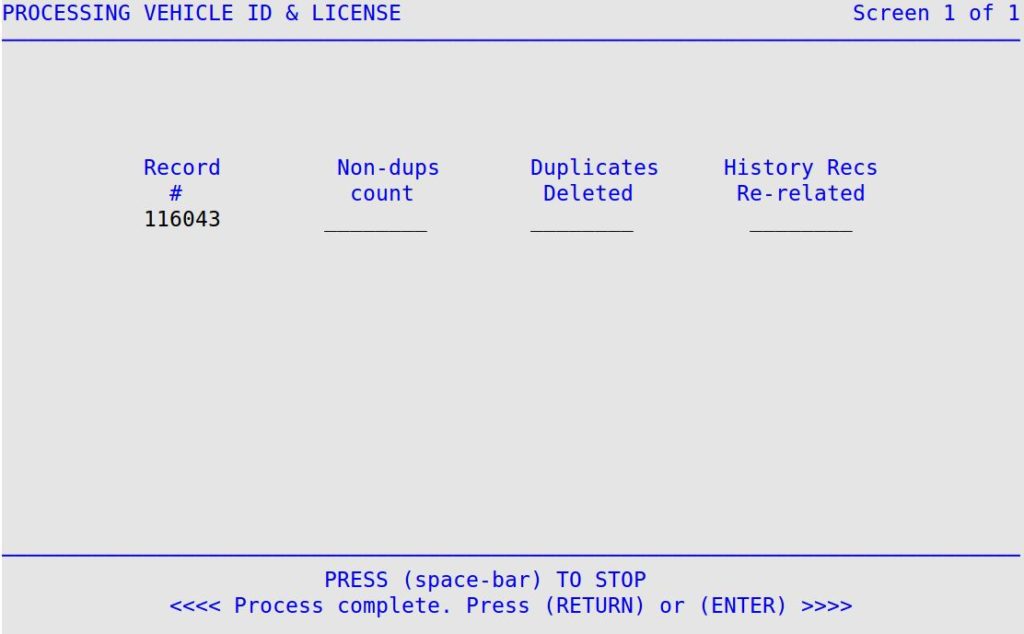
- To continue the correction process, type Y and press [Enter] to receive a password prompt. Call ISI Support for the Password of the Day. After entering the password, you receive the following screen:

- If you press the space bar at any time during the correction process, you receive the following message: Do You Wish to Terminate This Process? (Y/N).
- Do one of the following:
- To abort the process, type Y and then press [Enter] to return to the Other POS Utilities Menu. If you abort, part of your records will be in one format and part of them will be in another. Your technicians won’t be able to easily locate the records that have not been corrected.
- To continue the correction process, type N and press [Enter].
- The system keeps a count in the following fields during the correction process. Review the information in the following fields:
Record #
The system displays the number of the record on your file that is currently being processed. (Display only)
Non-dups Count
The system specifies the number of non-duplicate records processed. If your file does not have any duplicates, this count matches the count in the Record # field. (Display only)
Duplicates Deleted
The system displays the number of duplicate vehicle records deleted. (Display only)
History Recs Re-related
The system automatically fills in the number of vehicle history records that have had their vehicle history merged with an existing vehicle record. (Display only)
- Because problems can sometimes occur during this process, you should write down the final numbers in these four fields for reference.
- When the process is complete, you receive the following message: Process complete. Press (RETURN) or (ENTER).
- To return to the Other POS Utilities Menu, press [Enter].


