At the beginning of every business day, the store needs to be officially “opened.” Opening the center tells the system to begin accepting vehicles for service and gives the center a specific starting amount of cash for each till. If an employee is required to clock in before working, that employee must be clocked in to open the store.
Use the following steps to open your store:
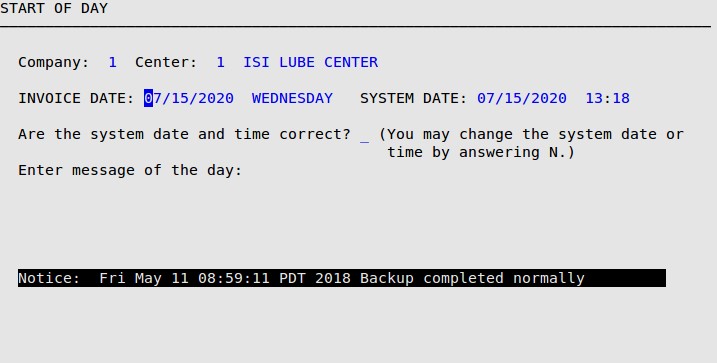
| If you see this message… | Type ok and finish opening the store. Then: |
|---|---|
| Your backup failed. Type ok to continue. | Follow the Warning Notice instructions that printed out on your printer. If you ignore this message, you could lose all your data. |
| You are scheduled to run postcards today. Type ok to continue. | Go to the Marketing Menu and run your postcards. |
| You have 2 file(s) ready to be archived. Type ok to continue. | Go to the Invoice Archiving Menu and archive your invoice files to disk. |
| Note: | You may see additional pop-up messages during the Start of Day. It is important to read these messages and follow any instructions. See the next section for more information. |
| Note: | If you have to change the invoice date in order for it to be the same as the system date, you receive the following message: You have changed the date. You may have missed a week or month closing. Is this ok? Type Y to move to the next field or N to return to the Invoice Date field. If you skip a weekly or monthly closing, you will create incorrect reporting for your statistics reports, timesheets, and other weekly and monthly reports. Be careful when answering this question! |
| Note: | The invoice date stays in the system until you close the center, even if you do not close until the next morning. It automatically advances to the next working day when you close your store. |
| Note: | You can change this message anytime during the day through the Change Message of the Day (1-2-4) option. You should change the Message of the Day before you process any vehicles so your reprinted invoices match any invoices you do during the day. |
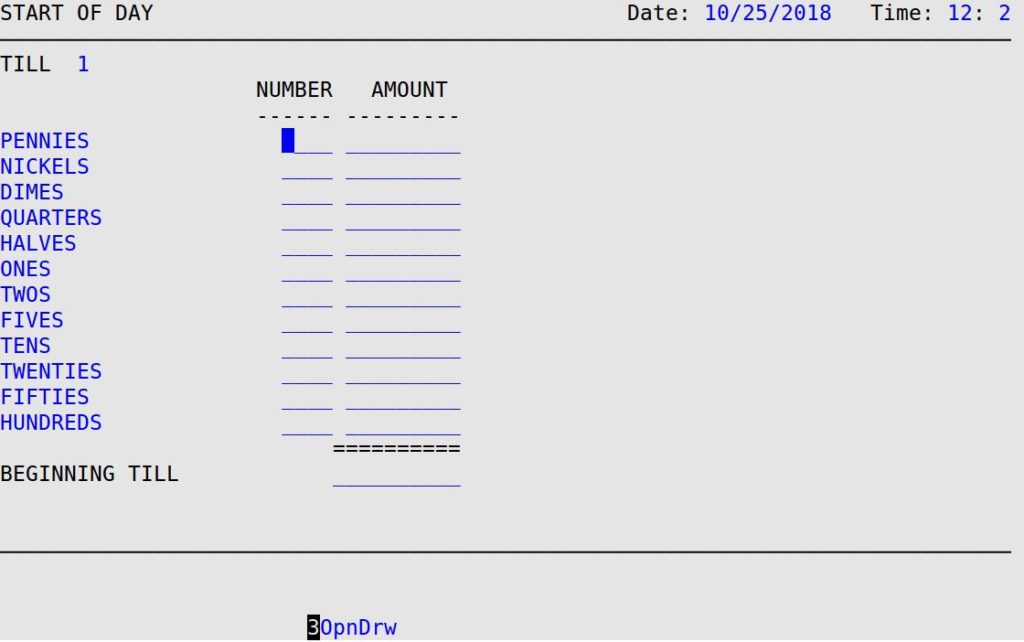
| Note: | To open your cash drawer during the start of day processes, press [F3]. Only the till located on the bay doing the opening will open. If the opening is done on a location without a till, no till will be opened. If the system is set up to run in the Drive Thru processing mode, no till will be opened. |
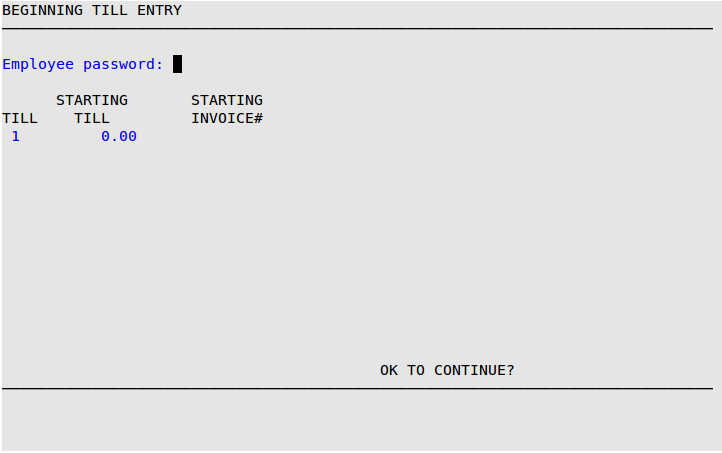
| Note: | If you do not have sufficient user security access, you will not be able to change the starting invoice number. |
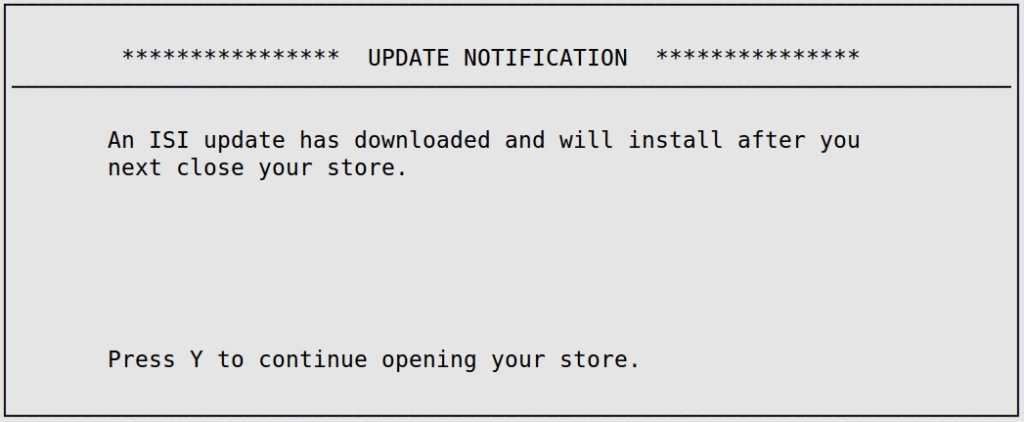
If an electronic update is ready to install, you receive the following notice. Press Y to continue with the store opening. The update will automatically attempt to run after the store is closed.
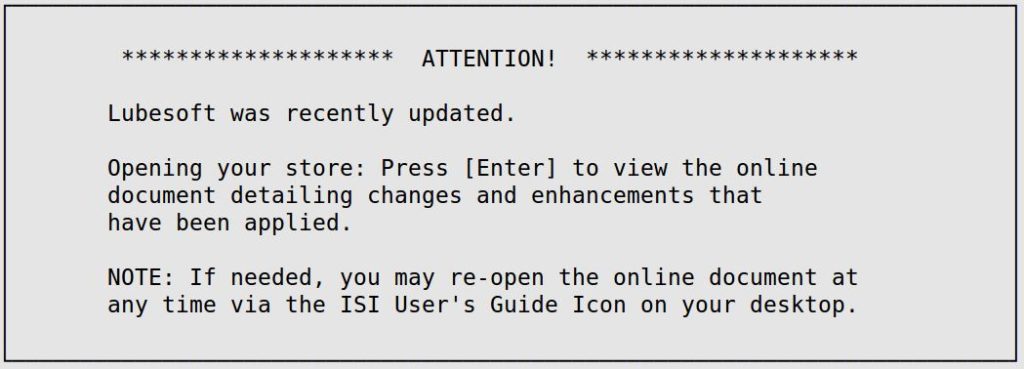
If the system was updated since the last time the store was opened, you receive the following screen. Press [Enter] to continue with the store opening. A browser will automatically open to the online User’s Guide page with information about features in the update.
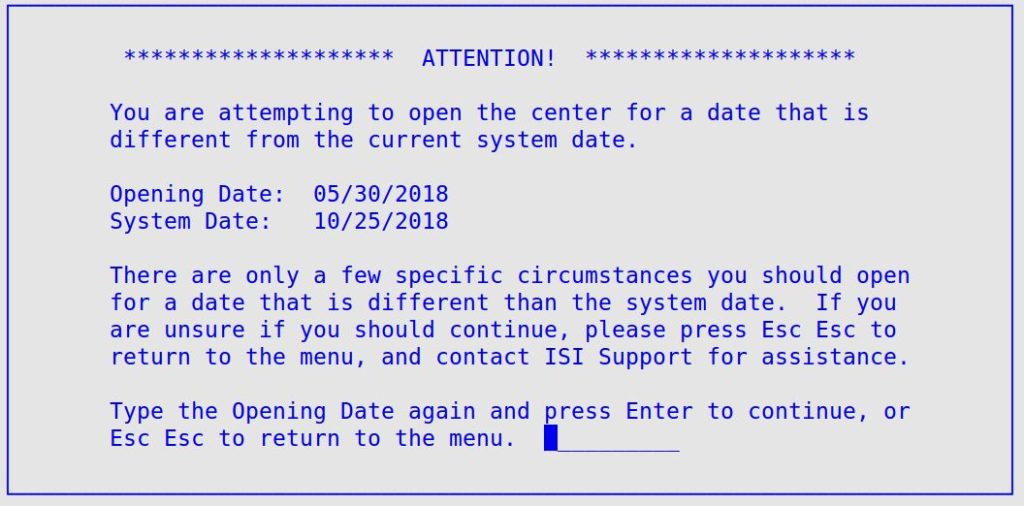
If the invoice date is different from the system date, you will receive the following popup. Follow the instructions on the screen. If you have any questions regarding the invoice date and the system date matching, contact ISI Support for assistance.
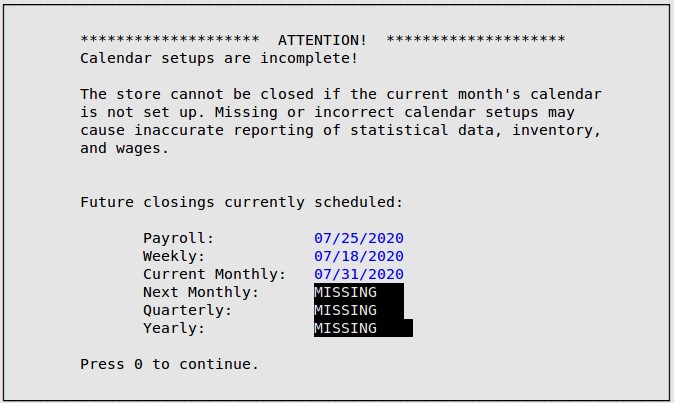
If any future closings are missing from your calendar setups, you receive the following screen. You can add missing closings by going to Set Up Calendar (1-6-4).
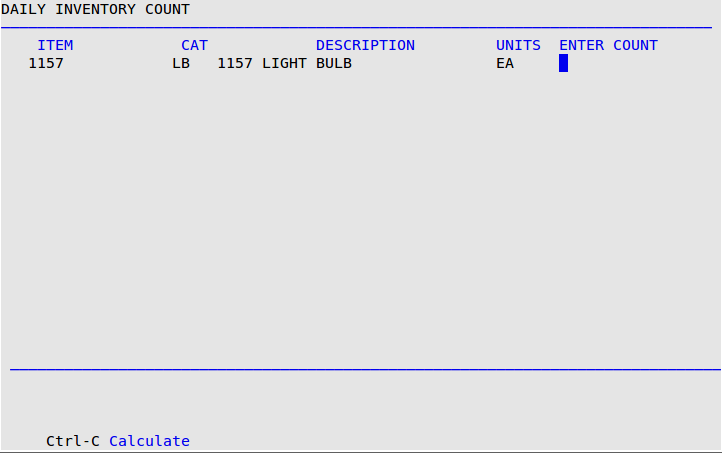
If any inventory items are set up to be counted daily, you receive the Daily Inventory Count screen. Count the item(s) listed, and type the number in the Enter Count field for each item. When the count is complete, you return to the Start/End Day Menu. You are open and ready for business.
| Note: | The screen does not display what is actually on hand in the computer to prevent “short-cutting.” If the count you entered matches the on-hand quantity in the computer, the cursor moves to the next item. If the entered count and the computer’s quantity on hand do not match, the computer beeps and the cursor stays on the number that was entered. Check for an entry error. If there is not an entry error, and the number entered is the one you want, press [Enter] again and continue entering counts. |
