Purpose of Document
Below is a step-by-step guide on how to use the Change ID function in ISI Central Setups to change the part number of an existing part.
Note: Change ID’s finalize during the closing process in LubeSoft at the store level.
How to use the Change ID Function
- Log into ISI Central and navigate to “Setups”, then “Inventory”.
- Using the search parameters, narrow down the search (typically by part number) so that only the part you are intending to change is listed in the search results.
- Now that we only have one record in our search results, the [Change ID…] button is available.

- Clicking on the [Change ID…] button will display up a pop up window:
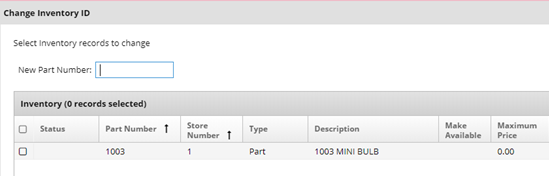
- Enter in the new part number in the “New Part Number” box.
- Place a check mark to the left of the part number to be changed to select it.
- Click on the [Continue] button at the bottom of the pop up box.
- You’ll receive a message saying “The Inventory ID was changed successfully”.